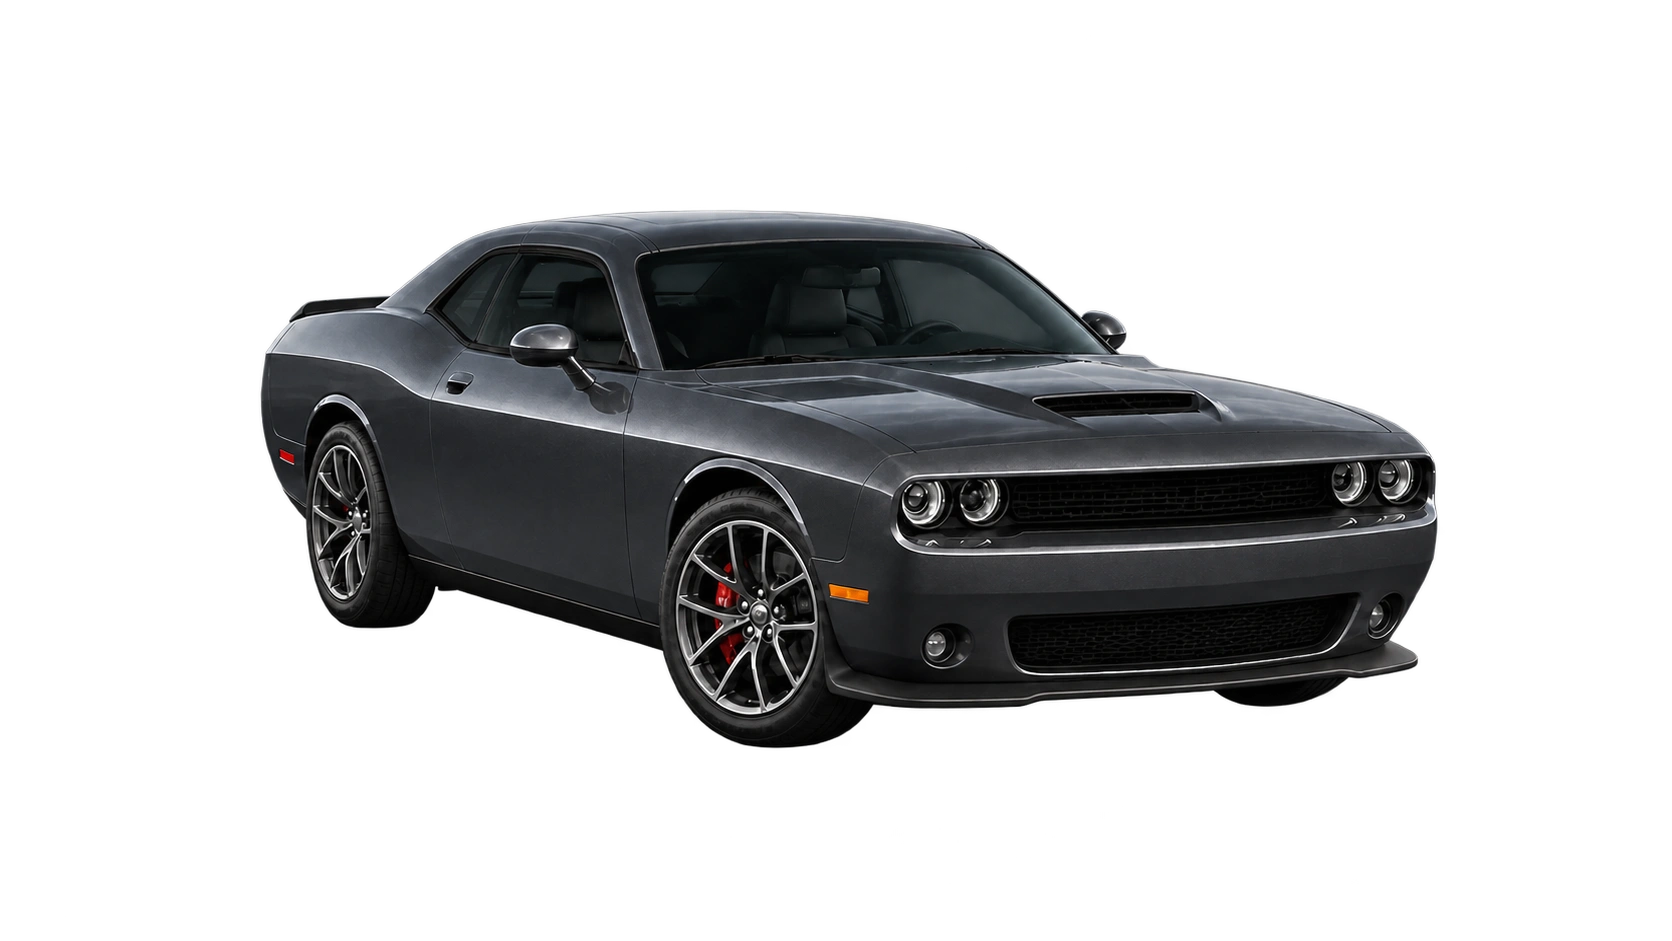
Chrysler (FCA US, LLC) is recalling certain 2023 Chrysler 300, Dodge Charger, and Dodge Challenger vehicles. The parking brake may be improperly adjusted, which can result in a vehicle roll away. As such, these vehicles fail to comply with the requirements of Federal Motor Vehicle Safety Standard number 135, "Light Vehicle Brake Systems."
Campaign #24V11200015/02/2024
SEATS:CRITICAL FASTENERS
Chrysler (FCA US, LLC) is recalling certain 2023 Dodge Challenger vehicles. The left rear seat back may not lock in the upright position. As such, these vehicles fail to comply with the requirements of Federal Motor Vehicle Safety Standard number 207, "Seating Systems."
Campaign #24V57300001/08/2024
BACK OVER PREVENTION: SENSING SYSTEM: CAMERA
Chrysler (FCA US LLC) is recalling certain 2020 Jeep Gladiator and Jeep Cherokee, 2019-2020 Ram 1500 Pickup, Ram 2500 Pickup, Ram 3500 Pickup, Chrysler Pacifica, Dodge Durango, Jeep Grand Cherokee, Jeep Wrangler, and Jeep Renegade and 2019 Dodge Challenger vehicles equipped with 8.4" or 12" radio displays. A software error can cause the rearview camera image to remain displayed after the vehicle has been shifted out of reverse. As such, these vehicles fail to comply with the requirements of Federal Motor Vehicle Safety Standard (FMVSS) number 111, "Rearview Mirrors."
🔧
A mechanic who knows YOUR exact car
Answers tuned to your year, make, model & trim — not generic advice. Save your garage so it always has the right context.
Get ahead of Dodge Challenger problems — free
Leave your email and we'll alert you the moment there's a new recall or known issue for your Dodge Challenger. Free, no account needed.
What are the most common Dodge Challenger problems?
According to Au7o's analysis of 3,208+ owner reports, the 2008-2023 Dodge Challenger has 37 documented issues. The most frequently reported are: Driveshaft Failure / U-Joint Failure, Electronic Power Steering (EPS) Rack Failure, Sudden alternator failure causing stall, electrical loss, and fire risk (Recalls 14V634 & 17V435). Of these, 11 are rated critical and should be addressed promptly.
Is the Dodge Challenger reliable?
The 2008-2023 Dodge Challenger has 37 known issues documented across 3,208+ owner reports. 11 issues are rated critical: Driveshaft Failure / U-Joint Failure and Electronic Power Steering (EPS) Rack Failure and Sudden alternator failure causing stall, electrical loss, and fire risk (Recalls 14V634 & 17V435) and TIPM (Totally Integrated Power Module) Failure — Random No-Start, Fuel-Pump No-Prime, Stalling & Battery Drain and Valve Spring Failure on 6.4L 392 HEMI (High-RPM and Modified/Boosted Cars) and PCM Circuit-Board Voltage Regulator Failure on the 2018 Challenger — Recall 18V524000 (U87) and Hellcat IHI Supercharger Bearing / Pulley Failure and Engine-Bay Wiring/Starter Cable Short-Circuit Fire Risk — Safety Recall (2013 V6, NHTSA 13V103 / Chrysler N18) and Dodge Challenger Engine Stalls / Shuts Off While Driving (Alternator & TIPM/Fuel-Pump-Relay Failure) and Takata Driver Frontal Airbag Inflator Rupture — "Do Not Drive" Recall (NHTSA 15V444000) and 2015-2018 Challenger Cruise Control May Not Disengage (Recall 18V332000). Prospective buyers should inspect for these issues and factor potential repair costs into their purchase decision. Regular maintenance following the manufacturer's schedule helps prevent many common problems.
How much does it cost to fix common Dodge Challenger problems?
Repair costs for known Dodge Challenger issues range from $0 to $12,000, depending on the specific problem and whether you choose DIY or professional repair. The most critical issue, Driveshaft Failure / U-Joint Failure, typically costs $300-$2,500 to repair. Au7o provides step-by-step DIY maintenance guides that can help reduce repair costs.
What year Dodge Challenger is the most reliable?
Reliability varies across model years of the Dodge Challenger. Based on documented issues, problems are most commonly reported in earlier model years. Au7o recommends checking the specific known issues for your target year before purchasing, and having a pre-purchase inspection performed by a qualified mechanic. Our known issues database covers the 2008-2023 Dodge Challenger with 37 documented issues documented across 3,208+ owner reports.
Content on this page was compiled with AI assistance using NHTSA complaints, TSBs, owner reports, and public automotive data. While we strive for accuracy, this information may contain errors. Always verify repair procedures and specifications with your vehicle's service manual or a qualified mechanic.
Filter:
When Issues Typically Appear
Driveshaft Failure / U-Joint Failure
15K-50K
ZF 8-Speed Transmission Harsh Shifting and Valve Body Failure
40K-60K
Pentastar V6 Rocker Arm/Lifter Tick
50K-100K
OEM Radiator Premature Failure
60K-100K
025K50K75K100K mi
The 2011-2014 Dodge Challenger is the subject of two overlapping NHTSA safety recalls for sudden alternator failure, and CarComplaints.com ranks alternator failure among the worst-reported electrical problems on the 2012 model year (its lowest-rated year overall). The root cause is thermal fatigue of the alternator's internal silicon rectifier diodes: repeated heat cycling cracks the diodes, producing rapid, near-warningless failure that can manifest as no output, reduced output, or a fully shorted-to-ground condition.
Recall 14V634 (filed October 2014, remedy began February 2015, Chrysler campaign P60) covers 2011-2014 Chrysler 300, Dodge Charger, Challenger and Durango plus 2012-2014 Jeep Grand Cherokee built April 22, 2010 to January 2, 2014 with the 3.6L Pentastar V6 and a 160-amp alternator -- roughly 435,000 vehicles. Recall 17V435 (filed November 2017, remedy began February 2018, campaign T36) expanded the population to vehicles with Electro-Hydraulic Power Steering (EHPS) and either the 3.6L V6 or 5.7L V8 HEMI equipped with 160-, 180-, or 220-amp alternators, built August 23, 2010 to July 4, 2014.
When the alternator fails the engine can stall without warning, raising crash risk; the voltage collapse can also disable safety systems (ABS / electronic stability control warning lamps illuminate and the systems can drop out) and, on EHPS-equipped cars, cause loss of power-steering assist, making the vehicle hard to control. In a worst-case shorted condition the alternator can overheat and catch fire. CarComplaints owners report failures clustering around 40,000-55,000 miles -- typically just outside the 36,000-mile basic warranty -- with whining/hissing from the engine bay, flickering ABS and traction-control lights, dimming headlights and interior lights, burning smells, and in several cases visible smoke or fire before complete shutdown.
Engine stalls or dies suddenly while driving, often with no warning
Battery / charging warning light illuminates
ABS and traction-control (ESC) warning lights flash on and off
Headlights and interior/dashboard lights dim or flicker
Loss of power-steering assist on EHPS-equipped cars (heavy, hard-to-turn wheel)
High-pitched whining or hissing noise from the engine bay
Burning smell, smoke, or in severe cases fire from the alternator
Battery overheats, swells, or dies prematurely (collateral damage)
Car cranks but will not start / repeated no-start
How to Fix
If your VIN is covered by recall 14V634 or 17V435, the repair is FREE at any Dodge/Chrysler dealer regardless of mileage or age -- check your VIN at nhtsa.gov/recalls or call Stellantis/Chrysler customer care at 1-800-853-1403 (reference campaign P60 or T36). Under 14V634 the dealer replaces the alternator outright; under 17V435 the dealer first inspects the alternator part number and replaces it only if it is one of the suspect units. Out of warranty and not covered by the recall (e.g. some 5.7L or higher-amp configurations), a standard alternator replacement runs about 2 hours of labor: budget roughly $300-$600 for a quality remanufactured or new unit and $150-$400 in labor, with full RepairPal shop estimates of about $800-$1,180 for the era. Owner-reported real-world bills span $500 to $1,290 (the high end including a battery the failing alternator damaged). Because a failing diode can dump unregulated voltage or overheat the battery, have the battery load-tested at the same time and address any flickering-light, ABS/ESC-warning, or burning-smell symptoms immediately rather than waiting -- a fully shorted alternator is a fire and stall hazard. Verify any aftermarket replacement is rated for your car's amperage (160/180/220A) and EHPS load.
The Totally Integrated Power Module (TIPM-7 generation) is the Challenger's central fuse-and-relay box and power-distribution computer, mounted in the engine bay. It manages nearly every electrical circuit, and a single failed solder joint, blown internal circuit-board trace, or — most commonly — a degraded internally-soldered fuel-pump relay can cripple the whole car. Because the fuel-pump (ASD) relay is hard-soldered into the TIPM circuit board (not a serviceable plug-in relay), owners cannot simply swap a relay. The dominant root cause is contamination/degradation of the sealed relay contacts (silicone vapor that hardens into insulation and burns under load) compounded by water/moisture intrusion and corrosion of the board, which is why failures are intermittent and often produce no stored trouble codes. The result is a cluster of seemingly unrelated, hard-to-diagnose faults: a relay stuck OFF causes random no-start, no fuel-pump prime, and mid-drive stalling; a relay stuck ON causes the fuel pump to run continuously and drain the battery overnight. This is the root cause behind the model's worst CarComplaints electrical category — the 2013 Challenger alone has a dedicated "bad TIPM" complaint cluster, with failures averaging around 43,000 miles (reported range roughly 8,000–76,000 miles), well within the life of the car. Critically for Challenger owners, the fuel-pump-relay recall campaigns (NHTSA 15V-115 / Safety Recall R09 and the 2019 redo 19V-813) covered the Durango and Jeep Grand Cherokee — NOT the Challenger. NHTSA's recall list for the Challenger shows only airbag and alternator campaigns, no TIPM recall, so Challenger owners pay out of pocket (commonly ~$700–$1,100). The 2008–2014 (LC-body) cars share the TIPM-7 implicated across the Chrysler/Dodge/Jeep lineup; 2010–2014 see the heaviest complaint volume.
Dealer finds no stored trouble codes despite the symptoms (intermittent)
How to Fix
Diagnose first, because TIPM failures frequently store no codes and mimic a dead fuel pump, bad ignition switch, or weak battery. Confirm the fuel pump does NOT prime/buzz for ~2 seconds at key-on, check for power at the pump connector during cranking, and inspect the TIPM for water staining, corrosion, or melted/discolored terminals. A telling field test: lightly tapping or flexing the TIPM while a helper cranks can momentarily restore the connection and start the car — confirming an internal relay/solder fault (a diagnostic clue, not a repair). Repair options, cheapest to most durable: (1) Fuel-pump-relay bypass — install an external aftermarket relay kit (or VV-style plug-in bypass module) that takes the fuel pump load off the failing internal relay; lowest cost (~$50–$150 plus labor) and resolves the most common no-start/no-prime failure mode. (2) Professional TIPM rebuild/repair — specialty shops (e.g., Circuit Board Medics, MAKS/TIPM Rebuilders) re-solder and replace the failed relays/board components for roughly $200–$400 with a warranty; you ship your unit or swap, no dealer programming needed. (3) OEM TIPM replacement at the dealer — typically $700–$1,100+ for the part plus diagnosis and required dealer flash/programming to your VIN (a replacement TIPM will not work until it is programmed). Because the Challenger is excluded from the fuel-pump-relay recall, none of this is covered free unless the car is still under warranty — confirm your VIN against NHTSA recalls regardless, since campaign scope occasionally expands.
What you need to fix it
Only diagnosis- and fitment-reviewed repair parts are linked here.
MAKS/TIPM Rebuilders repair-and-return service for base TIPM 04692270
Repair the owner's original module only after power, ground, pump and terminal testing points to an internal TIPM failure Fitment: Exact 2008 Challenger/base-number 04692270 service; read the label on the original module before ordering …
MAKS/TIPM Rebuilders repair-and-return service for base TIPM 68059370
Repair the original 2010 module after the no-prime/no-start fault is electrically isolated to the TIPM Fitment: Exact 2010 Challenger/base-number 68059370 service; module-label confirmation is mandatory $239 and Add to Cart on the live U…
The 2018 Dodge Challenger appears on the vehicle list for NHTSA recall 18V524000. On the recalled cars, the voltage regulator chip inside the powertrain control module's circuit board may fail. The two outcomes described in the recall are a stall and a no-start — the car either shuts down while being driven or will not fire up in the first place. NHTSA classes the defect as front underhood electrical wiring and notes that a stall increases the risk of a crash. Chrysler's number for this campaign is U87.
Common Symptoms
Engine stalls while driving
Car will not start
How to Fix
Dodge dealers replace the powertrain control module at no charge under this safety recall. Owner notification began October 2, 2018. If you own a 2018 Challenger — especially one bought used — check the VIN at nhtsa.gov/recalls to confirm whether 18V524000 / U87 is still open, and schedule the free module replacement if it is. Chrysler customer service: 1-800-853-1403.
In March 2013, Chrysler Group LLC issued an urgent safety recall (NHTSA Campaign 13V103000, Chrysler recall N18) for a narrow build window of 2013 Dodge Challenger V6 models — vehicles equipped with the 3.6L Pentastar V6 and manufactured at the Brampton, Ontario plant between December 3, 2012 and January 24, 2013 (roughly an eight-week window). The official NHTSA record lists 4,051 potentially affected vehicles; contemporary media reporting cited approximately 4,459 units, with about 1,900 still sitting on dealer lots and the remainder already in customer hands.
The defect is in the engine-bay (front underhood) wiring: the battery positive cable at the starter motor can experience an electrical short circuit to ground. A short in this high-current circuit can cause the wiring harness to overheat and ignite, leading to an underhood/vehicle fire. The root cause traced to a shipment of faulty electrical components delivered to the assembly plant; during early investigation one of the parts actually caught fire while workers were handling it, prompting Chrysler to escalate to a full recall.
This is a genuine fire-hazard recall. At the time the campaign was announced, seven Challengers had already caught fire, though no crashes or injuries were reported. Because of the severity, Chrysler took the unusual step of telling owners to stop driving the vehicle immediately and not to park it inside or near a garage, building, or other structure until the repair was completed. Affected vehicles were provided loaner cars for the duration of the repair.
This issue is specific to the 2013 V6 build window only. It is unrelated to the separate 2014–2015 alternator recalls (14V634, 17V435) or the Takata airbag recalls that also touch these cars. Owners can confirm whether their specific VIN is covered by entering it at nhtsa.gov/recalls.
Visible scorching, melting, or discoloration of wiring near the starter/battery positive terminal
Underhood electrical fire
Intermittent no-crank or hard starting from a degraded high-current starter cable
Blown fuses or electrical anomalies tied to the underhood harness
Recall notice received by mail or phone advising owner to stop driving the vehicle
How to Fix
The recall remedy is performed free of charge at any Dodge/Chrysler dealer: technicians replace the underhood starter cable / battery positive cable assembly that contains the defective wiring, eliminating the short-circuit and fire risk. Owner notification mailings began March 22, 2013.
Steps for an owner today: (1) Run your 17-digit VIN through the NHTSA recall lookup at nhtsa.gov/recalls or call the NHTSA Vehicle Safety Hotline at 1-888-327-4236 to confirm whether 13V103 (Chrysler N18) is open on your specific car. (2) If it shows as not yet completed, schedule the free repair at a dealer — recall remedies have no expiration on safety campaigns and remain free regardless of vehicle age or mileage. (3) If you cannot get the car in immediately and the recall is unremedied, follow the original guidance: avoid driving it and do not park it near structures, since the failure can occur without warning.
Out of warranty / outside the recall (for reference only — this specific repair should be free under N18): replacing an underhood battery/starter positive cable harness is a modest electrical job. Parts (the cable/harness assembly) typically run about $60–$200, with roughly 1–2 hours of labor, putting a comparable non-recall repair in the low-to-mid hundreds. Any signs of melted insulation, burnt-smell, intermittent no-crank, or scorching at the starter/battery terminal should be inspected immediately by a professional given the fire risk.
Dodge Challengers built for the 2015 through 2018 model years are covered by FCA recall 18V332000. The recalled defect could prevent the cruise control system from disengaging: NHTSA states that if a short circuit occurs within the car's wiring while cruise control is engaged, the driver may not be able to shut it off by depressing the brake pedal or by manually turning the system off. The Challenger would then maintain its current speed or possibly accelerate. NHTSA's consequence statement is an increased risk of a crash. Note that the Challenger's model-year range in this campaign starts at 2015, one year later than most of the FCA vehicles included, so a 2014 car is not part of it.
Common Symptoms
Brake pedal does not cancel cruise control
Cruise control cannot be switched off once engaged
Car maintains its set speed or accelerates unexpectedly
How to Fix
Repair is free at a Dodge dealer, which inspects the software and performs a software flash on the engine or powertrain control module. Owner notification began June 4, 2018, and Chrysler customer service is 1-800-853-1403. Enter the VIN at nhtsa.gov/recalls to confirm your Challenger is covered and that the flash was performed. Do not use cruise control until the update is complete. If cruise control ever refuses to disengage while driving, apply the brakes firmly and steadily, shift the transmission into neutral, and put the car in park once it has stopped.
The Uconnect infotainment system (8.4-inch 4C/4C NAV/UAQ head units, and the 7-inch Uconnect 4) on the Dodge Challenger is widely reported to freeze, go to a black or blue blank screen, and spontaneously reboot — sometimes in continuous reboot loops while driving. The fault is intermittent: the screen may lock up at a stoplight, cycle the Dodge/Uconnect boot logo repeatedly, drop all audio, and become unresponsive to touch. Because the same head unit drives the reverse/backup camera and HVAC/cabin controls, a freeze or reboot takes out the backup camera image and climate touch controls, which is the primary safety concern that elevates this beyond a nuisance. The 2018 model year is especially notorious (owners report nearly every unit eventually needing replacement), but the problem spans roughly 2015–2023, and brand-new 2023 cars have been reported failing out of the box. Two distinct failure modes are involved: (1) infotainment software/firmware faults causing the freeze/reboot behavior, and (2) head-unit hardware failure — either internal radio-module failure (which can set DTC B221E-00 "RADIO INTERNAL FAILURE" and require module replacement) or LCD/digitizer adhesive delamination and bubbling that produces "ghost touch," erratic input, and unresponsive areas.
Touchscreen freezes and becomes unresponsive to touch
Black or blank screen with no display
Screen turns solid blue then freezes
System spontaneously reboots, sometimes in a continuous loop while driving
Stuck on the Dodge / Uconnect boot logo
Complete loss of audio from the radio/media
Backup/reverse camera image does not display or freezes
HVAC and other cabin touch controls become inoperable
Ghost touch / erratic phantom inputs from screen delamination or bubbling
Issue is intermittent and may require an engine off/on cycle to recover
How to Fix
Start with the no-cost software path: have the dealer apply the latest Uconnect software/firmware update (many freeze/reboot complaints are resolved by a flash, and there is a related security software campaign — NHTSA 15V461000 — for 2015 units). A user-level reset can temporarily clear a freeze: disconnect the negative battery terminal for 15–20 minutes to power-cycle the module, or use the on-screen/hard reset (hold the volume and tune knobs, or the lower buttons, for ~20–30 seconds). If the unit still freezes, reboots, blanks out, or sets B221E-00 RADIO INTERNAL FAILURE, the head unit has a hardware fault and must be repaired or replaced. If the vehicle is in factory or extended warranty, push for warranty replacement of the Uconnect unit. Out of warranty, the dealer route is the most expensive (a full head-unit replacement). Cheaper alternatives that fix the common delamination/ghost-touch and many display faults are board-/component-level repair services (e.g., Circuit Board Medics, CUE Rescue) that rebuild your existing unit with no reprogramming and a warranty, or a DIY OEM LCD/touchscreen replacement. Note that delamination-only failures are a display fix, whereas true internal radio-module failure (B221E) requires the radio assembly itself.
A widely reported electrical complaint across nearly all Challenger model years is excessive parasitic battery drain that leaves the car dead overnight or after sitting a few days. A healthy modern vehicle should settle to roughly 25-50 mA of key-off draw once all modules go to sleep; owners reporting this problem measure anywhere from several hundred milliamps to over 2-4 amps, which is enough to flatten a battery in a day or two. There are several distinct, real-world root causes documented across owner forums (ChallengerTalk, ChallengerForumz, Hellcat.org), NHTSA/CarComplaints filings, and repair sites:
1) Smart-glass / one-touch power window self-cycling — the single most-reported cause in NHTSA and CarComplaints/CarProblemZoo data (18+ "battery dead" reports concentrated on 2010-2014, plus 2018). A faulty window switch or window module causes the driver- or passenger-side glass to drop and raise itself a fraction of an inch repeatedly with the key off, running the motor until the battery is dead. Chrysler issued a recall on 2011 cars for a related concern, but owners of 2012+ report the same symptom with no recall.
2) TIPM (Totally Integrated Power Module) faults — the under-hood power/fuse-relay computer controls dozens of circuits and can keep a circuit "awake" or stick a relay closed, producing a steady ~1-2 A draw. TIPM failure is a known weak point on Chrysler/Dodge platforms and a common diagnosis on early (2008-2014) cars.
3) Infotainment / Uconnect radio (RER, 730N, and later Uconnect head units) not entering sleep mode — a hung or buggy radio keeps the accessory bus awake. Owners report dealers pulling the radio fuse to confirm, then resolving it with a head-unit software re-flash (e.g., updating to 18.45.01) or radio replacement; multiple owners also report repeated radio/touchscreen failures on 2015-2017 cars.
4) Stuck switches and accessories — faulty door-jamb/courtesy switches that keep a dome light on, a trunk/glovebox/vanity light staying on, door-lock actuator faults, or aftermarket add-ons (alarms, amps, dash cams) wired to a constant-hot circuit.
5) Alternator diode failure — a shorted rectifier diode lets current bleed backward through the alternator with the engine off; some owners also have a charging fault where the PCM voltage regulation is at fault, so a new alternator alone does not fix it.
6) Hellcat / supercharged charge-air-cooler (intercooler) auxiliary coolant pump not shutting off — on 2015+ supercharged cars the aux pump can fail to power down (often after coolant intrudes into the connector or a loose intake-box ground), running the pump and killing the battery in as little as 3 days; this typically also sets charge-air-cooler pump DTCs (P023B, U02A9). SRT models from 2018+ include a "Storage Mode" that reduces key-off draw and should be enabled when parking.
Battery dead the next morning or after the car sits a few days
Car needs a jump-start frequently despite a relatively new battery
Power window drops and raises itself a fraction of an inch with the key off / ignition off
Audible relay clicking or a motor/pump running after the car is shut off and locked
Key-off parasitic draw measures well above the normal ~25-50 mA (often hundreds of mA to 2-4 A)
New battery still goes dead and alternator tests fine
Infotainment/Uconnect radio or touchscreen freezing, restarting, or failing to power down
Hellcat intercooler/charge-air pump stays warm and running after shutdown
Battery/charging warning light or flickering dash lights
Dome, trunk, or courtesy light staying on with doors closed
How to Fix
Confirm the charging system first: load-test the battery and verify alternator output with a multimeter, including an AC-ripple check to catch a failing diode (a new battery that keeps dying with a "good" charging test points to parasitic draw, not the battery). Then perform a key-off parasitic-draw test: let the car fully sleep (30-60 minutes, doors closed), put a meter in series with the negative battery cable, and confirm the draw. Anything sustained above ~50 mA is suspect; over ~250 mA will flatten the battery overnight.
Isolate the offending circuit by pulling fuses/relays one at a time (both the under-hood and trunk-area fuse boxes) and watching for the draw to drop. Common findings and fixes:
- Power-window self-cycling: replace the faulty window switch or window/door module and reset window auto-up programming; have the dealer check for any applicable recall/extended-warranty coverage.
- Radio/Uconnect not sleeping: confirm by pulling the radio fuse; fix with a head-unit software re-flash/update or replace the head unit if it won't sleep.
- TIPM keeping a circuit awake or a stuck relay: swap/replace the suspect relay or, if confirmed, the TIPM.
- Stuck door/courtesy/trunk switch or stuck dome light: replace the faulty switch.
- Alternator diode: replace the alternator (and verify PCM charging control if the fault persists).
- Hellcat charge-air-cooler aux pump not shutting off (P023B / U02A9): inspect/clean the intake-box ground and the pump connector for coolant intrusion; replace the auxiliary coolant pump if it won't power down.
- Aftermarket accessories: move any constant-draw add-ons to a switched/ignition circuit.
When storing the car, enable SRT "Storage Mode" (2018+ SRT, via steering-wheel/center-display menu) or use a battery maintainer/trickle charger to prevent recurrence.
What you need to fix it
Only diagnosis- and fitment-reviewed repair parts are linked here.
Innova 3320 auto-ranging digital multimeter
Its DC10A input is unfused and the manual limits high-current readings; incorrect series connection can damage the meter or vehicle, so use the exact manual procedure and a current clamp/professional diagnosis when the draw may exceed th…
NOCO GENIUS5 five-amp charger, maintainer and desulfator
Long-term-storage support after the battery and charging system are known good, or while an infrequently driven vehicle is stored Fitment: Universal 6V/12V lead-acid including AGM and lithium support; it does not locate or repair a paras…
The production valve springs on the 6.4L 392 HEMI can crack or fracture. A weakened spring can cause a persistent single-cylinder misfire that remains after plug, coil, or injector swaps; a complete fracture can let the valve contact the piston and cause major cylinder-head or engine damage. High-RPM and modified/cammed use changes valvetrain load, but the correct replacement spring must be selected from the camshaft's lift and required installed/open pressures rather than from boost alone.
Persistent single-cylinder misfire that does NOT go away after replacing spark plugs, coil packs, or injectors
Rough idle, stuttering, and a shaking/vibrating engine
Check engine light flashing under load (active misfire)
Loss of power and the car going into limp/reduced-power mode
Low compression on the affected cylinder during a compression or leak-down test
Ticking, clattering, or valvetrain noise from one bank
In a full failure: severe knocking, loss of a cylinder, then catastrophic engine failure (dropped valve)
Symptoms most often appear after track use, hard high-RPM driving, or on modified/cammed/boosted cars
How to Fix
Stop driving if a broken spring is suspected. Confirm the fault with compression or leak-down testing and valve-cover inspection before buying parts. For affected 2021-2022 Challenger/Charger 6.4L vehicles, FCA GPOP bulletin 9004444 directs technicians to replace all valve springs after a broken spring is confirmed, not only the failed spring; other model years should follow the current VIN-specific service procedure. The OEM production repair uses sixteen 5037382BC springs. Mopar Performance 68277306AA is an individual higher-lift spring: a full 6.4L engine requires sixteen plus correctly sized shims, and the spring must match the camshaft's lift and pressure requirements. Aftermarket PAC/BTR/Comp/Livernois sets should likewise be selected to the cam manufacturer's specification.
What you need to fix it
Only diagnosis- and fitment-reviewed repair parts are linked here.
High Horse Performance bundle of 16 genuine Mopar 5037382BC production valve springs
Full-engine production-spring repair after compression/leak-down and valve-cover inspection confirms a broken or weakened spring Fitment: 2011-2023 Challenger 6.4L 392 HEMI subset in this issue; the live title extends through 2024 and ex…
Mopar Performance 68277306AA beehive valve spring
Modified/cammed engine branch only when the camshaft manufacturer specifies this spring's lift and pressure characteristics Fitment: One spring; sixteen plus correctly sized shims are required for a full 6.4L engine, and this must not be…
Confirmation tool before buying valve-spring parts; distinguishes valve leakage from rings, cylinder walls or head-gasket leakage Fitment: Universal professional test tool with 14 mm hose and 10/12/18 mm adapters; requires a regulated co…
The IHI twin-screw supercharger fitted to the 6.2L supercharged HEMI in the Challenger SRT Hellcat, Redeye, and Demon is prone to internal bearing failure, typically heard first as a rising whine, growl, or whir from the front of the engine that gets louder with RPM and engine warmth. The root cause is a design margin problem: from the factory the supercharger uses Nachi 6204 (front snout, behind the pulley) and 6203 (rear snout, ahead of the male coupling) bearings fitted with full-contact (NSE) rubber seals rated for only roughly 10,000-12,000 RPM. The male rotor and snout shaft, however, can spin to around 25,000 RPM at the 6,200 RPM redline. The full-contact seals create friction and heat that cooks the factory Mobil Polyrex EM grease over time; once the grease breaks down the bearing wears, grows loud, and can eventually seize or shed material into the blower. Owners who fit a smaller (overdrive) upper pulley to make more boost spin the snout even faster and dramatically accelerate failure, so modified cars are over-represented in failure reports, but bone-stock cars fail too. Failures have been documented from very low mileage (one 2019 Redeye reported bearing failure at roughly 2,000 miles; another stock car at about 1,700 miles). Because the IHI unit integrates the blower, intake manifold, and the air-to-water charge cooler in one assembly, Dodge's only factory remedy is replacing the entire supercharger, which is why this is a high-cost, high-anxiety issue in the Hellcat/Redeye/Demon community with multiple dedicated multi-page forum threads. There is no OBD-II diagnostic trouble code for this; it is a mechanical wear failure diagnosed by sound, so a clean scan tool does not rule it out.
Common Symptoms
Whine, whir, or growl from the front of the engine that rises with RPM
Noise that grows louder as the engine warms up
Supercharger bearing whine audible at idle or on light throttle
Rough or notchy feel and axial play when spinning the snout pulley by hand
Grinding, rattling, or ticking from the blower at higher mileage or after pulley changes
Noise that returns shortly after a previous supercharger replacement
Possible boost loss or rough running if a bearing seizes or sheds material
How to Fix
Diagnose the noise before spending money: confirm the whine/growl is the supercharger and not the belt tensioner, idler, decoupler pulley, or accessory drive (a Litens/aftermarket pulley or tensioner can disintegrate and mimic blower bearing noise). With the belt removed, spin the snout pulley by hand and feel for roughness, axial play, or grinding. If the car is still under the factory 3-year/36,000-mile bumper-to-bumper or 5-year/60,000-mile powertrain warranty AND the supercharger has not been modified (no smaller pulley, no over-revving), have a Dodge dealer replace the unit under warranty at no cost. Out of warranty, two paths exist. (1) Full OEM supercharger replacement runs roughly $4,000-$7,500 for the part plus install, and complete dealer jobs are commonly reported around $10,000-$12,000 once labor and related gaskets/fluids are included. (2) The far more economical fix favored by enthusiasts is a specialist rebuild of the existing IHI unit: the shop presses out the failed Nachi snout bearings and installs upgraded bearings that use non-contact labyrinth seals (for example NTN 6203LLB-type, or ceramic high-speed bearings), which run cooler, retain grease, and are rated to ~18,000+ RPM instead of the stock 10k-12k. Reputable rebuilders (e.g., Jon Bond Performance, FAS Motorsports, SDG Motorsports, High Horse) charge roughly $3,000-$4,000 for a Stage 2/Stage 3 rebuild that replaces all bearings, seals, and couplers, often with SKF/GMN/Timken or ceramic bearings and an optional race-bearing package. After repair, avoid undersized overdrive pulleys on a daily car, keep the belt and tensioner healthy, and address any new whine immediately rather than driving on a failing bearing (a seized blower or shed debris can cause far more expensive engine damage).
What you need to fix it
Only diagnosis- and fitment-reviewed repair parts are linked here.
F.A.S. Motorsports upgraded Hellcat supercharger snout bearings, one set
Bearing-only branch after belt-off isolation confirms roughness or play inside the snout and a competent supercharger rebuilder has inspected the shaft, pulley and coupler Fitment: Hellcat IHI supercharger snout component rather than a c…
2.7L snout replacement after diagnosis confirms the noise and play are internal to the snout rather than the belt tensioner, idlers or accessories Fitment: Vendor application explicitly covers Challenger H.O. 2.7L variants including 2019…
Genuine Mopar 53011558AA supercharger drive-belt tensioner with pulley
Replace only when belt-off inspection identifies weak tension, pulley roughness, misalignment or contact in the supercharger drive rather than internal blower damage Fitment: Official page identifies 2015-2024 Mopar 6.2L Hellcat/Redeye s…
Genuine Mopar 68267539AA supercharger gasket kit
Reseal component for a 2.4L supercharger removal/opening procedure; it supports a verified rebuild or replacement and is not a stand-alone cure for bearing noise Fitment: Live fitment lists 2015-2020 Challenger 6.2L; later and H.O. 2.7L …
The Dodge Challenger has a well-documented tendency to stall or shut off completely without warning while driving — a top-3 engine-category complaint at NHTSA and one of the most-reported electrical/engine problems at CarComplaints. There are two primary, separately documented root causes that present the same symptom.
(1) ALTERNATOR FAILURE (3.6L Pentastar, and later 5.7L/6.4L with electro-hydraulic power steering). Chrysler began investigating stalling complaints on 2011-2012 Dodge Chargers in August 2014 and found thermal fatigue of the silicon diodes inside the alternator. The large, intermittent current draw of the electro-hydraulic power-steering (EHPS) pump thermally stresses the diodes until the alternator fails suddenly. This became NHTSA recall 14V634 (Chrysler P60), covering ~434,000 2011-2014 Chrysler 300, Dodge Charger, Challenger, Durango, and 2012-2014 Jeep Grand Cherokee vehicles with the 3.6L engine and 160-amp alternator (remedy began Feb 27, 2015). It was later expanded under NHTSA recall 17V435 (remedy began Feb 12, 2018) to additional 2011-2014 cars with EHPS and 5.7L or 3.6L engines. NHTSA's stated consequence for both: "If the alternator fails, the vehicle may stall without warning, increasing the risk of a crash," with an additional risk of an underhood fire from a short circuit.
(2) TIPM (Totally Integrated Power Module) / FUEL-PUMP-RELAY FAILURE (2008-2014, all engines). The TIPM is the car's central fuse/relay/electrical-distribution computer. When it (or its internal fuel-pump relay) degrades, owners report the engine stalling or shutting off mid-drive, intermittent no-starts, flickering lights, and multiple simultaneous warning lights (check engine, traction control/ESC, ABS). CarComplaints documents this on the 2009 Challenger ("engine shuts down while driving," 7 complaints, severity 8.6/10, ~$800 average repair, ~43,300 miles) and the 2013 Challenger ("bad TIPM," 12 complaints, severity 7.2/10, ~$940 average repair, ~43,050 miles).
Because the engine quits unexpectedly, the driver loses power steering and (on automatics) power braking assist while the car is in motion — making this a genuine safety hazard, especially in intersections, on highway merges, and during turns. Multiple NHTSA complaints describe near-crashes and crashes from sudden loss of power.
Engine suddenly shuts off / stalls while driving with no warning
Stalling during turns, merging, or in intersections (loss of power steering and brake assist)
Battery / charging-system warning light, then dimming or flickering headlights and dash lights (alternator)
Multiple warning lights at once (check engine, traction control/ESC, ABS)
Intermittent no-start or having to cycle the ignition several times to start
Engine cranks but won't fire after a stall
Random electrical glitches (lights flashing, wipers activating, alarm cycling) before the stall (TIPM)
Hesitation or loss of acceleration before shutdown
How to Fix
First, check open recalls by VIN at nhtsa.gov/recalls or with a Dodge dealer — 2011-2014 3.6L cars (and EHPS 5.7L/6.4L cars) are covered by alternator recalls 14V634 / 17V435, which replace the alternator FREE of charge. If your car qualifies, this is the cheapest and correct fix.
For the alternator path off-recall: a charging-system test (battery, alternator output, voltage drop at the alternator plug/ground) confirms the failure. Watch for the battery/charge warning light, dimming lights, and a P0562 (system voltage low) DTC before a full stall. Replace the alternator (3.6L commonly uses a 160A or 220A unit) and inspect the wiring connector and ground for corrosion/damage, since a bad plug or ground can mimic a failed alternator.
For the TIPM path: have the TIPM and its internal fuel-pump relay tested. A common, far cheaper interim fix for the fuel-pump-relay failure mode is an external fuel-pump relay bypass kit that takes the load off the failing internal relay (~$50-120 part). The full fix is replacing/rebuilding the TIPM — replacement modules run roughly $500-900 plus programming/labor, or a specialist rebuild is often more cost-effective. Inspect/clean grounds and check for water intrusion into the module.
Confirm the diagnosis before throwing parts at it: scan for DTCs, monitor charging voltage with the engine running (should be ~14.1-14.4 V), and note whether the stall is preceded by electrical glitches (TIPM) or a charge/battery warning (alternator).
Some 2015-2021 Dodge Challenger 5.7L and 6.4L engines can develop a persistent engine-speed-related tick, rough idle, loss of power, or misfire from hydraulic roller-lifter, roller, or cam-lobe wear. A tick alone does not prove internal wear: exhaust-manifold leakage, injector noise, oil-pressure concerns, and other causes must be ruled out. MDS fitment is transmission-specific, not engine-name-wide: automatic 5.7L and 6.4L applications use cylinder deactivation, while six-speed manual applications are non-MDS. Cam and lifter wear is not limited to MDS hardware.
Retrieve DTC and misfire data, localize the noise, and check for exhaust-manifold leakage before buying internal parts. If cam/lifter wear is suspected, inspect the lifter rollers and cam lobes and check the VVT oil-control-valve screen for metal debris. FCA STAR case S1709000010 directs camshaft/lifter replacement when wear is confirmed and no screen debris is present; debris can indicate that a larger repair or engine replacement is required. Use the lifter type that matches the factory transmission/MDS configuration and verify by VIN. A stock automatic-MDS full-engine service set requires two front 5038785AD packs and two rear 5038786AD packs. A factory non-MDS/manual full-engine set requires four OEM 5038784AD packs, or an exact retailer bundle of sixteen lifters and four yokes. On an automatic-MDS car, non-MDS lifters are only one part of a complete engineered mechanical delete with compatible cam/supporting parts and calibration. Correct oil and electronic MDS disabling do not repair a worn lifter, roller, or camshaft.
What you need to fix it
Only diagnosis- and fitment-reviewed repair parts are linked here.
Genuine Mopar 5038785AD front MDS hydraulic lifters and yoke pack
Front-position MDS lifter pack for a confirmed MDS valvetrain repair after the heads are removed and roller/cam damage is inspected Fitment: Live fitment lists 2009-2023 Challenger 5.7L/6.4L, but the year-specific catalog specifies MDS/f…
Genuine Mopar 5038786AD rear MDS hydraulic lifters and yoke pack
Rear-position companion pack for a complete factory-MDS lifter repair Fitment: Live fitment lists 2009-2023 Challenger 5.7L/6.4L; pair with the front packs only on a verified MDS engine, and confirm that two front plus two rear packages …
Complete lifter branch for a factory non-MDS/manual-transmission 5.7L or 6.4L after cam and roller inspection confirms replacement Fitment: Live bundle explicitly contains 16 lifters and four yokes and lists 2015-2023 Challenger 5.7L/6.4…
Camshaft replacement when lifter-roller failure has visibly or measurably damaged a lobe on the verified 5.7L MDS engine Fitment: Year-specific catalogs identify this as the 5.7L MDS cam; direct fitment lists 2009-2023 Challenger 5.7L. D…
High ConfidenceVerified678 owner reportsLast reported by owners Jan 2024Reviewed Aug 2026
Community reported
350 owners
The plastic oil filter housing warps and cracks from heat cycling, causing oil leaks from front of engine near oil filter. In severe cases coolant and oil can mix. Common across all Pentastar 3.6L vehicles (Challenger, Charger, 300, Jeep, Ram).
Replace with Dorman aluminum aftermarket housing (926-959 with oil cooler, 2011-2023) for a permanent fix vs the OEM plastic housing that will crack again. Dorman 926-876 is the earlier version without cooler.
What you need to fix it
Only diagnosis- and fitment-reviewed repair parts are linked here.
Dorman 926-959 complete aluminum engine-oil-filter housing and cooler assembly
Primary complete replacement after cleaning and inspection confirm the Pentastar oil-filter adapter/cooler assembly is the oil or coolant leak source Fitment: Live exact fitment lists 2011-2023 Dodge Challenger 3.6L.
High ConfidenceVerified350 owner reportsLast reported by owners Nov 2025Reviewed Aug 2026
Community reported
345 owners
The 3.6L Pentastar V6 engine can develop a ticking noise from worn rocker arms. Unlike the HEMI MDS tick, this is caused by the roller follower rocker arms wearing out prematurely. The issue typically appears between 50,000-100,000 miles and is more common on 2011-2013 engines but can occur on later models.
Replace the affected rocker arms. Many owners replace all 24 rocker arms preventatively when doing this repair ($400-800 for parts). Labor is 4-6 hours ($400-600). Total repair cost is typically $800-1,400. Using quality synthetic oil and regular oil changes can help prevent premature wear.
What you need to fix it
Only diagnosis- and fitment-reviewed repair parts are linked here.
Mopar 5184296AH valve rocker arm
Replacement for each rocker whose roller, bearing or contact surface is confirmed faulty after the valve cover is removed and the cam lobes are inspected Fitment: Live OEM fitment lists 2011-2023 Challenger 3.6L and the year catalog requ…
High ConfidenceVerified345 owner reportsLast reported by owners Feb 2024Reviewed Aug 2026
Community reported
320 owners
Exhaust manifold bolts break due to thermal cycling causing the bolts to become brittle and snap, especially on the passenger side. Dissimilar metals (iron manifold, aluminum head) accelerate the process. Creates a ticking noise at cold startup. Common across all HEMI-powered LX/LC platform vehicles.
Extract broken bolts using ProMAXX drill template tool kit (PMXA200PROP). Replace with Mopar double-ended studs (6509863AA/6510141AA) and Grade 8 nuts instead of bolts. Apply anti-seize on new hardware. Felpro gasket set MS96692 for 2008-2014.
What you need to fix it
Only diagnosis- and fitment-reviewed repair parts are linked here.
ProMAXX Alan PMXA200PROP broken exhaust-manifold bolt repair ProKit
Drill-template extraction tool explicitly named by the repair for broken bolts flush with or below the cylinder head Fitment: Dodge HEMI 5.7L and 6.1L only; not the 6.4L geometry $419.91, stock 47 and add-to-cart live on the US tool reta…
ProMAXX Chad PMXCD200PRO 6.4L HEMI broken-bolt repair kit
Engine-specific extraction tool for the 392/6.4L branch that the 5.7L/6.1L template does not cover Fitment: 6.4L HEMI; manufacturer/retailer describes Dodge/Ram engine fitment, so confirm Challenger manifold access before purchase $365.5…
The page does not substantiate a blanket 6.1L/6.4L or 2021-2023 Challenger claim, so those applications need VIN/catalog confirmation $11.65 and Add to Cart on the live OEM product page when checked
Manifold-to-head reseal during the broken-fastener repair Fitment: 5.7L HEMI application only after vehicle fitment confirmation; not the 6.1L/6.4L gasket branch $56.99 and Add to Cart on the live AutoZone US product page when checked
Genuine Mopar 5038099AA left exhaust-manifold gasket
Left-side gasket for the 6.1L/6.4L repair branch; pair with the VIN-confirmed right-side 5038098AA Fitment: 6.1L/6.4L HEMI Challenger subset according to OEM catalog; order by engine and side Live direct OEM product page when checked
High ConfidenceVerified320 owner reportsLast reported by owners Oct 2025Reviewed Aug 2026
On the Gen-III Hemi V8 (5.7L VVT from 2009 on, and the 6.4L/392 across its run), engine oil is cooled by a coolant-fed oil cooler integrated into the oil-filter adapter housing that sits in the engine valley, beneath the intake manifold. The cooler is a coolant-to-oil heat exchanger sealed to the adapter and the block by O-ring-style gaskets. As these seals age and harden, the assembly weeps oil externally (often appearing as oil seeping down the front/rear of the engine or pooling near the oil-filter area) and, because oil and engine coolant pass through adjacent passages, a failed internal seal can let the two fluids mix — milky/emulsified oil on the dipstick or oil contamination in the coolant. A documented aggravating cause is over-torquing the spin-on/cartridge oil filter or filter cap during oil changes, which can distort or crack the housing and its seals. Because the cooler is buried under the intake manifold, the repair is labor-intensive (intake manifold removal and a full coolant drain/refill), which is what pushes the bill far above a simple gasket job. This is the V8 oil-cooler/adapter failure and is distinct from the Chrysler 3.6L Pentastar V6 plastic oil-filter-housing leak — different engine family, different part, different failure mode and cost.
Common Symptoms
Oil seeping or dripping near the oil filter / down the front or rear of the engine
Coolant level slowly dropping with no obvious external coolant leak
Milky, tan, or emulsified oil on the dipstick or oil cap (oil and coolant mixing)
Oil sheen or contamination visible in the coolant overflow/reservoir
Burning-oil smell from oil weeping onto hot engine components
Coolant pooled in the intake valley around the oil cooler when the manifold is removed
Leak worsening shortly after an oil change (over-tightened filter)
How to Fix
Confirm the source before tearing into it: an oil-temperature sensor or the two external coolant hoses at the cooler can mimic a cooler-seal leak, so inspect those first. If oil is found in the coolant (or coolant in the oil), pull the intake manifold and check for coolant/oil in the valley around the oil cooler to confirm. The fix is to replace the oil cooler and its O-ring/seal set (and the oil-filter adapter housing if cracked or warped), typically the Mopar coolant-fed oil cooler assembly (e.g. Mopar 05037523AB for 09-23 5.7L VVT and 6.4L; the related oil-cooler seal is sold separately), then refill engine oil and coolant. Because the intake manifold must come off, expect significant labor. Many owners and shops switch to a more durable aftermarket aluminum oil-cooler/housing (e.g. Dorman) to reduce repeat failures. Prevent it: torque the cartridge filter cap / spin-on filter to spec and do not over-tighten, and if mixing is suspected do not keep driving, since coolant-contaminated oil offers little lubrication and can damage bearings.
What you need to fix it
Only diagnosis- and fitment-reviewed repair parts are linked here.
Genuine Mopar 5037523AB engine oil cooler
OEM replacement after cleaning and inspection prove the factory 6.4L oil-to-coolant cooler itself is leaking rather than a sensor, hose, filter seal, fitting or another engine source Fitment: Exact live fitment lists 2011-2020 Challenger…
Aftermarket direct-replacement cooler branch for the same confirmed 6.4L cooler failure Fitment: Live retailer fitment explicitly lists 2011-2023 Challenger 6.4L and Dorman's manufacturer page identifies an aluminum core; this is an engi…
A P0300 "random/multiple cylinder misfire" code with a rough, shaking idle is one of the most common drivability complaints on the Dodge Challenger, and on a high-mileage or maintenance-overdue car it is most often caused by worn spark plugs and/or weak ignition coils rather than an internal engine fault. The 5.7L and 6.4L HEMI V8s are especially prone because they run two spark plugs per cylinder (16 total), so worn plugs are a frequent misfire source; the 3.6L Pentastar V6 also commonly throws misfires from failing coil-on-plug units. Because P0300 is the "random/multiple" code (versus cylinder-specific P0301–P0308), it points to a condition affecting several cylinders at once — typically a full set of tired plugs, or coils that break down intermittently under load/heat. Owners notice it most at idle and during light acceleration. Critical: if the check engine light is FLASHING, the misfire is severe enough to dump raw fuel into the exhaust, which can quickly overheat and destroy the catalytic converter(s) — turning a routine tune-up into a far more expensive repair. Note: the 2011–2013 3.6L V6 also had a documented left-cylinder-head defect (Chrysler warranty extension X56), and 2014+ Pentastars can suffer rocker-arm needle-bearing wear; these can present similar misfire codes and should be ruled out if new plugs and coils don't resolve the P0300.
Check engine light with code P0300 (random/multiple cylinder misfire)
Rough, shaking, or unstable idle
Hesitation or stumble under light acceleration
Reduced power and engine surging
Flashing check engine light during a severe misfire (warns of catalytic converter damage)
Slightly rough running or vibration felt through the cabin
Occasional rotten-egg/sulfur smell or fuel smell if cat is being damaged
How to Fix
Start with a full ignition tune-up before chasing internal-engine causes. Pull and inspect the spark plugs for wear, fouling, or excessive gap; replace the complete set with the correct factory-spec iridium plugs (HEMI V8s take 16 plugs — both banks must be done). To pinpoint a bad coil, swap the coil from a suspect cylinder to an adjacent easy-access one, clear codes, and retest — if the misfire follows the coil, replace that coil (replacing all coils as a set is common on high-mileage cars). Also check for vacuum/intake leaks (smoke test) and inspect fuel injectors if plugs and coils are good. Spark plug intervals: the 5.7L HEMI called for ~30,000 miles through 2013, extended to ~100,000 miles for 2014+; long-life iridium plugs are standard. DIY parts are inexpensive (a set of HEMI plugs runs roughly $130, individual coils are modest), making this a high-value job to do yourself. If the CEL is flashing, stop driving and tow it to avoid catalytic-converter damage. If a fresh set of plugs and coils does NOT clear the P0300, move on to compression/leak-down testing to rule out the 2011–2013 head defect or rocker-arm/lifter wear.
What you need to fix it
Only diagnosis- and fitment-reviewed repair parts are linked here.
Genuine Mopar SP149125AF spark plug
Complete six-plug tune-up branch when inspection, service interval or testing identifies worn/fouled plugs on the 3.6L Pentastar Fitment: Live exact fitment lists 2011-2023 Challenger 3.6L and supersedes SP149125AD/AE; a complete engine …
Later 5.7L sixteen-plug tune-up branch after confirming the model year/engine specification Fitment: Live exact fitment lists 2014-2023 Challenger 5.7L and supersedes SP143877AA/68143877AB; a complete engine set requires 16 individual pl…
6.4L sixteen-plug tune-up branch when plug wear/fouling is confirmed Fitment: Live exact fitment and year catalog list 2011-2023 Challenger 6.4L; a complete engine set requires 16 individual plugs $13.46 each and Add to Cart on the live …
Test-confirmed coil replacement branch for the 5.7L or 6.4L after a coil swap/circuit test identifies the failure Fitment: Live exact fitment includes 2008-2023 Challenger V8 applications and year catalogs require eight coils; the issue …
First-generation (2008-2010) Dodge Challengers are equipped with a Takata dual-stage driver's frontal airbag inflator that is subject to NHTSA recall 15V444000 (FCA/Chrysler recall R37) — part of the largest and most dangerous auto recall in history. The ammonium-nitrate-based propellant inside the inflator degrades over time, especially after prolonged exposure to heat and humidity. When this happens, a crash that deploys the driver's airbag can cause the metal inflator housing to rupture and spray sharp metal shrapnel at the driver and occupants, turning a routine deployment into a potentially fatal event. Because the danger increases as the vehicle ages, FCA/Stellantis escalated this to a formal "Do Not Drive" warning in November 2022, covering 2005-2010 Dodge Magnum, Charger, Challenger and Chrysler 300 vehicles (~276,000 units, with roughly 225,000-233,000 still unrepaired). That escalation followed three deaths in 2010 Dodge Chargers in warm-weather U.S. states where the driver inflator burst apart. Across all automakers, defective Takata inflators have killed at least 28 people and injured more than 400 in the U.S. Owners of an affected, unrepaired Challenger are urged to stop driving it until the inflator is replaced. The 2008-2010 Challenger recall covers vehicles built September 19, 2007 through October 29, 2010 (88,460 units).
Common Symptoms
No warning signs before failure — the inflator can rupture during a normal airbag deployment in a crash
Airbag warning light may illuminate if the system detects a fault, but a defective Takata inflator can rupture with no light at all
Higher risk on vehicles that have spent years in hot, humid climates (Gulf Coast, Southeast, Southwest)
Open recall shown when checking the VIN at nhtsa.gov/recalls or mopar.com/recalls
Vehicle subject to an active 'Do Not Drive' safety advisory
How to Fix
This is a free safety recall — there is no out-of-pocket cost to the owner. Check your VIN at nhtsa.gov/recalls or mopar.com/recalls (or call Stellantis/FCA at 1-800-853-1403, Stellantis stop-drive line 833-585-0144, or NHTSA at 888-327-4236). If your Challenger is affected, do not drive it; schedule the recall repair (Chrysler recall R37 / NHTSA 15V444000) at any authorized Dodge/Chrysler dealer. The dealer replaces the Takata driver's frontal airbag inflator at no charge — typically a 1-2 hour job. Because these vehicles are under a "Do Not Drive" advisory, Stellantis offers free mobile/at-home repair, free towing/vehicle pickup, and free loaner vehicles in many cases — ask the dealer or the stop-drive hotline. Replacement inflators have been available since 2015, so parts are generally in stock. Do not attempt a DIY fix and do not buy a used aftermarket Takata inflator; only a recall-spec replacement installed by a dealer corrects the defect. If you are buying a used 2008-2010 Challenger, verify the recall has been completed before purchase.
The Dodge Challenger — especially HEMI-powered R/T, Scat Pack, and Hellcat trims — is one of the most-stolen vehicles in the United States, and its passive keyless-entry/push-button-start system is the reason. Thieves exploit several well-documented electronic attacks: (1) Relay amplification, where two people use signal-boosting devices to grab the key fob's signal from inside the owner's house and relay it to the car, unlocking and starting it while the real key never moves. (2) OBD-II key cloning, where a thief gains brief interior access (window punch / lock bypass), plugs a programming tool into the OBD port under the dash, and burns a brand-new fob to the car in minutes. (3) Under-dash hotwiring/bypass on older units. The Highway Loss Data Institute (HLDI/IIHS) found the high-output Charger/Challenger HEMI and Hellcat cars top the most-stolen list for 2020-22; theft claims for the SRT Hellcat ran more than 60 times the average vehicle (about 25 claims per 1,000 insured vehicle-years), and even the standard HEMI was more than 20 times average. These cars have ranked in the top five most-stolen for over a decade because the powertrain is valuable, the security was easy to defeat, and stolen examples are quickly resold or stripped. This drives extremely high-intent "how do I keep my Challenger from getting stolen" search demand among owners.
Common Symptoms
Vehicle stolen with no broken glass and no key (relay attack from a fob left near a door/window)
Vehicle gone in minutes with door/window punch and a tool plugged into the OBD-II port
Repeated break-in or attempted theft of an unmolested, locked car
Sharply higher comprehensive insurance premiums or insurer refusing to cover high-output trims
Glass breakage at the window/door with the car still present (interrupted OBD-clone attempt)
Owner cannot self-program keys after dealer security lockdown is applied
How to Fix
Layer multiple deterrents — no single fix is complete. FREE FACTORY FIXES (any Dodge dealer reflash, covers 2015-2021 model years): (1) Enhanced Security Mode — set a 4-digit PIN in the radio/Uconnect head unit that, when armed, limits the engine to just 2.8 horsepower until the code is entered, so a thief with a cloned key literally can't drive off; it's free and reversible. (2) Key Programming Lockdown — locks the in-car key-programming system so thieves can't burn a new fob via OBD; the tradeoff is you can no longer self-program keys without buying a replacement security module (about $159), and Dodge offered discounted keys at install. (3) Intrusion Module (standard on 2022 Scat Pack/Hellcat, retrofittable) — alarms on glass breakage, interior motion, or tow/tilt. CHEAP OWNER STEPS: keep fobs in a Faraday pouch/box (~$10-25) to block relay attacks; pull the starter and/or ignition relay from the underhood fuse box when parked long-term; use a steering-wheel lock or brake/pedal lock as a visible deterrent; install a GPS tracker. STRONGEST AFTERMARKET: a Ravelco-style mechanical kill plug (~$500-900 installed) hides a plug-and-socket in the harness so the engine won't run without the owner's plug — immune to cloning, relay, and hotwiring. Many owners also have the dealer "burn"/lock the RF hub immobilizer so no additional fobs can ever be programmed.
What you need to fix it
Only diagnosis- and fitment-reviewed repair parts are linked here.
TICONN Faraday key-fob signal-blocking box
Home-storage layer intended to block the passive key signal used in relay-amplification attacks Fitment: Universal key-storage product rather than Challenger fitment; after purchase, place every fob/spare inside, take the closed box to t…
Ravelco professionally installed anti-theft device for Dodge Challenger
Treat vendor theft-prevention claims as marketing, not a guarantee, and verify warranty/installation coverage before ordering $799.95 and Add to Cart on the live US installer page when checked
FCA US (now Stellantis) issued NHTSA safety recall 20V191 on April 1, 2020, covering 2019 Dodge Challengers equipped with the 8.4-inch or 12-inch Uconnect radio display. A software error in the radio/display module can cause the rearview (backup) camera image to remain on screen after the driver shifts the transmission out of reverse, instead of clearing and returning to the normal infotainment view. Because the live reverse image lingers when the car is moving forward, the vehicle does not comply with Federal Motor Vehicle Safety Standard (FMVSS) No. 111, "Rear Visibility / Rearview Mirrors." The persistent reverse image is a driver-distraction hazard that can increase crash risk while driving forward. The 2019 Challenger was part of a larger FCA campaign (manufacturer codes W30–W37) spanning roughly 319,610 vehicles across multiple Dodge, Jeep, Ram, and Chrysler models. This is purely a display/software fault — the camera hardware and the reverse function itself work correctly; only the screen-clearing logic is defective.
Backup/rearview camera image stays on the center display after shifting out of reverse into drive
Reverse camera view does not clear and return to radio, map, or home screen
Live camera feed lingers on screen while driving forward
Infotainment screen stuck showing rear bumper/parking guidelines when no longer in reverse
Driver distraction from a persistent reverse image during forward driving
How to Fix
The remedy is a free radio/display software update. Owners can either (1) have a Dodge/Stellantis dealer reflash the Uconnect radio software at no charge under recall 20V191 (FCA campaign W30–W37), or (2) install the fix themselves via a free Over-The-Air (OTA) update that FCA released on May 1, 2020 — the vehicle downloads and applies the updated software when connected, no dealer visit required. There is no parts replacement and no out-of-pocket cost. Owners can confirm whether their specific VIN is affected and still open at nhtsa.gov/recalls or by calling Stellantis/Chrysler customer service at 1-800-853-1403 (reference recall W30–W37 / NHTSA 20V191). Because it is a recall, the repair remains free regardless of vehicle age or mileage.
The rear driveshaft on high-powered Challengers can experience premature U-joint failure or driveshaft issues, especially under hard launches, drag racing, or with aftermarket power upgrades. The factory driveshaft may not handle repeated high-torque loads. Some owners report multiple failures within 50,000 miles.
Common Symptoms
Clunking noise when shifting
Vibration at highway speeds
Grinding or clicking from under car
Noticeable play in driveshaft
Complete driveshaft failure during hard launch
How to Fix
Replace failed U-joints with high-strength units like Spicer SPL70 or SPL90. For repeated failures, upgrade to an aftermarket one-piece aluminum driveshaft from DSS, The Driveshaft Shop, or Tom Woods ($600-1,200). If drag racing or running 500+ HP, a carbon fiber driveshaft ($1,500-2,500) is recommended. Always check driveshaft balance after replacement.
What you need to fix it
Only diagnosis- and fitment-reviewed repair parts are linked here.
Aftermarket complete-shaft upgrade for repeated factory-shaft/CV/support failures or higher-power use Fitment: 2015-2023 Challenger 5.7L and 6.4L V8 with automatic transmission; requires rear cradle lockout before installation and may re…
Manual-transmission complete-shaft upgrade branch Fitment: 2015-2023 V8 HEMI Challenger with manual transmission; live fitment includes R/T, Scat Pack, SRT 392 and manual Hellcat applications, with the same cradle-lockout and exhaust-cle…
Supercharged 6.2L automatic complete-shaft branch Fitment: 2015-2023 Challenger SRT Hellcat, Redeye and Demon 6.2L automatic; does not fit Demon 170 and requires a rear cradle lockout, with possible exhaust modification Normally in stock…
Mopar 68272626AD complete driveshaft, superseded by 68272626AE
Factory-style complete shaft after VIN and transmission confirm this build Fitment: Live direct page lists 2019-2023 Challenger 5.7L/6.4L applications; catalog diagram identifies the automatic-transmission branch, so 2015-2018 and other …
High ConfidenceVerified523 owner reportsLast reported by owners Feb 2024Reviewed Aug 2026
A long-running, widely documented complaint across Dodge Challenger forums is a ring-and-pinion gear whine from the rear differential that is transmitted into the cabin, typically most noticeable at steady cruising speeds around 40-45 mph (and again at highway speed in top gear). The high-pitched whine changes pitch with road speed and is usually most pronounced once the differential oil is warm and the driveline is under a light torsional load - it appears under light throttle or when backing off the throttle just enough to unload the drivetrain, and often quiets when coasting in neutral. Dodge engineering acknowledged the problem: the gear-mesh noise in the ring and pinion is amplified through the differential housing into the rear cradle/subframe and then resonates into the passenger compartment. On 2009-2012 cars (SRT8 and 5.7L manual-transmission models), Dodge issued TSB #03-001-12 (July 6, 2012) calling for a mass damper kit (essentially tuned harmonic dampers/"tuning forks", part #68156617AA) mounted to the rear cradle to absorb the whine frequency. On later 2014-2019 V8 cars the issue resurfaced and became the subject of a class-action lawsuit alleging the rear differentials cannot fully handle the engines' torque, leading to premature ring gear, pinion gear, and bearing wear, with metal particulates contaminating the gear oil; some dealers replaced entire differentials or driveshafts under warranty, though replacements sometimes whined just as much because a degree of gear whine is inherent to these axles. The condition is generally a noise/nuisance issue rather than an imminent safety failure, but in the worst lawsuit-cited cases it progressed to actual differential wear and vibration.
Common Symptoms
High-pitched gear whine from the rear of the car, audible inside the cabin
Whine most noticeable around 40-45 mph and again at highway speed in top gear
Pitch of the whine rises and falls with vehicle speed
Whine appears or worsens under light throttle or when easing off the throttle, and quiets when coasting in neutral
Noise becomes more pronounced once the differential oil is warmed up
Howling or whirling sound from the rear end (more advanced cases)
Vibration felt from the rear of the car in severe cases
Metal shavings or discolored/low fluid found in the differential
How to Fix
Start by confirming the noise truly originates at the rear axle (verify it is not tire/wheel-bearing noise) and check the differential fluid - several owners found the factory gear oil low, discolored, or contaminated with metal. A fluid change to a quality 75W-90 synthetic gear oil (Royal Purple is a frequent forum recommendation) with the correct limited-slip friction modifier reduced or eliminated the whine in many cases (owners report 75-80 percent improvement). For 2009-2012 SRT8 and 5.7L/TR-6060 manual cars, ask the dealer about TSB #03-001-12, which installs a mass damper/tuned harmonic kit (P/N 68156617AA) on the rear cradle to absorb the whine harmonic - reported to cure roughly 75 percent of the noise. If the whine is severe, accompanied by metal in the fluid, or there is vibration, the dealer may replace the differential (ring-and-pinion/carrier) or the driveshaft under powertrain warranty (5 yr/60,000 mi); document the complaint early and keep the service ticket open so coverage applies even if the fix comes later. Note that because some gear whine is inherent to these axles, a replacement diff should follow the proper break-in (gentle driving for the first few hundred miles) and may still produce mild whine.
What you need to fix it
Only diagnosis- and fitment-reviewed repair parts are linked here.
Genuine Mopar 04318060AD limited-slip additive, 4 oz
Conditional companion additive when the VIN/axle identification confirms a clutch-type limited-slip differential and the service specification calls for it Fitment: Universal Mopar friction modifier rather than a model-specific part; do …
The EPS rack assembly can fail suddenly, causing complete loss of steering assist while driving. Circuit board contamination in the EPS module causes short circuit. Corrosion in rack assembly compounds the issue. Recalls S19 (NHTSA 16V-167) and VB8 (NHTSA 19V-812) cover some vehicles.
Common Symptoms
Power Steering Assist Off warning message
Sudden loss of steering assist while driving
Heavy steering requiring significant effort
C2217-00 code (EPS Module Internal failure)
Intermittent power steering loss
How to Fix
Replace EPS rack assembly. Check VIN at safercar.gov for recall eligibility - recalls S19 (NHTSA 16V-167) and VB8 (NHTSA 19V-812) provide free repair for affected vehicles. Post-replacement steering angle sensor recalibration required.
High Confidence280 owner reportsLast reported by owners Sep 2025Reviewed Feb 2026
One of the most widely reported Dodge Challenger complaints — the "infamous front-end clunk." Owners across the LX-platform (2008-2023) describe a clunk, pop, knock, or rattle from the front suspension on initial acceleration, light braking, low-speed turns, and especially over small bumps, expansion joints, driveways, and uneven pavement. It is a chassis/suspension wear-and-tolerance issue, not engine-specific, so it appears on every engine from the early 3.5L V6 through the 6.2L Supercharged Hellcat. The 2012 Dodge service manual itself lists the standard culprits for a front-end clunk/snap on turns: worn or loose tie-rod ends, worn or loose ball joints, worn or loose control-arm bushings, loose stabilizer (sway) bars, and loose crossmember bolts. In practice the single most common source is the stock front sway-bar end links: the nylon-lined joint develops play, and a known design weakness leaves a gap between the sway-bar mount hole and the link stud (the shoulder washer prevents the stud shoulder from seating against the bar), allowing the link to knock. Heat-damaged nylon from impact-gun installation accelerates the wear. Secondary contributors that develop with age/mileage are worn outer tie-rod ends (owners report play well beyond the ~0.002 in spec, e.g. 0.009 in), tired front control-arm bushings, and worn ball joints. The noise is annoying and a sign of worn steering/suspension components, but it is rarely a sudden safety failure — hence medium severity. It has very high DIY and parts-affiliate intent: end-link kits are cheap and a popular first fix.
Clunk, pop, or knock from the front end over small bumps, expansion joints, and driveways
Clunk on initial acceleration and on light/initial braking
Popping or creaking from the front suspension during low-speed turns
Rattle from the front end on rough or uneven pavement
Noise that quiets temporarily after re-torquing or repositioning the sway-bar link washer, then returns
Audible play/looseness felt when shaking the sway-bar end links or tie-rod ends by hand
Excessive outer tie-rod end play (well beyond ~0.002 in spec)
Vague or slightly loose steering feel as tie-rods/bushings wear
How to Fix
Diagnose by source before throwing parts at it. With the car safely on stands, grab and shake each front sway-bar end link, the outer tie-rod ends, and the ball joints to feel for play, and inspect control-arm bushings for cracking/separation; a pry bar and a helper rocking the steering wheel help isolate the knock. Cheapest/first fixes for the classic sway-bar-link clunk: (1) re-torque all front-end linkage bolts to spec — some owners had a dealer simply re-torque the linkage and the clunk went away; (2) the well-known "washer trick" — remove/reverse the shoulder washer on the end-link stud so the stud shoulder seats firmly in the sway-bar mount hole, closing the gap that lets it knock. If links are worn, replace the front sway-bar end links (many owners install beefier aftermarket links — MOOG, etc.) — torque the nut while holding the stud with a wrench (never use an impact gun, which spins the stud and melts the nylon). For noise that remains after the links, replace worn outer tie-rod ends, front control-arm bushings, and/or ball joints as inspection dictates; any tie-rod or control-arm work requires a follow-up wheel alignment. Component lifespans vary, but tie-rod ends and bushings commonly need attention around 80k-120k miles, sooner with aggressive driving or rough roads.
What you need to fix it
Only diagnosis- and fitment-reviewed repair parts are linked here.
Genuine Mopar 4895482AC front sway-bar end link
Most common clunk branch only when inspection finds play at the passenger-side RWD link Fitment: 2008-2023 RWD Challenger passenger/right side; pair with 4895483AC for the left side $59.63 and Add to Cart on the live OEM product page whe…
AWD-specific worn-link branch Fitment: 2017-2023 Challenger GT AWD and SXT AWD with 3.6L; fits either front side $60.75 and Add to Cart on the live OEM product page when checked
The year-specific steering diagram assigns this part to RWD and separate parts to AWD $108.00 and Add to Cart on the live OEM product page when checked
Control-arm/ball-joint branch only after bushing separation or joint play is confirmed; alignment required afterward Fitment: 2011-2023 Challenger RWD with suspension sales code SDD or SDE, either side; other RWD performance codes and AW…
Early third-generation (LC platform) Challengers from roughly 2008-2014 are prone to premature rust at the rocker panels and lower body, typically appearing as paint bubbling and rust-through just forward of the rear wheels where the rocker meets the rear quarter. The root cause is a design flaw: Dodge filled the lower rear-quarter/rocker cavity with sound-dampening (styrofoam/spray) foam that acts like a sponge, holding road moisture, snow-melt and salt against the bare metal from the inside out, while also blocking the factory weep/drain holes. The plastic rocker moldings clip into unsealed rectangular cutouts along the sill, letting salt-laden splash enter the cavity. Because corrosion starts inside the panel, it is often advanced by the time bubbling shows on the paint surface. Owners across ChallengerTalk, ChallengerForum, CarComplaints and TrueDelta consistently report the same location and pattern, generally surfacing after about 5-8 years of all-season/road-salt driving (CarComplaints' two 2010 reports averaged ~104,000 miles, ranging 64k-143k). The problem is markedly reduced on facelifted 2015+ cars, making it a generation-specific issue. There is no recall or extended warranty; Dodge has denied goodwill claims on out-of-warranty cars.
Paint bubbling or blistering on the lower body just forward of the rear wheels
Rust appearing where the rocker panel meets the rear quarter panel
Rust-through or holes in the lower rocker/sill, often visible after removing the plastic rocker molding
Flaking paint and orange staining along the bottom of the doors and sills
Sagging or loose plastic rocker moldings as the metal behind them corrodes
Wet or rust-stained foam found in the rear-quarter/rocker cavity behind the wheel-well liner
Surface rust on underbody and subframe components
How to Fix
Catch it early. Pull the inner rear wheel-well liner and remove the moisture-trapping foam from the rocker/rear-quarter cavity by hand, then verify the factory weep/drain holes are clear (drill/clean if blocked) so water can escape; flush the cavity and treat the interior with a penetrating rust inhibitor or cavity wax (e.g., Fluid Film, NH Oil Undercoating, or a wax-based product) and re-treat annually in salt-belt regions. For surface bubbling caught early, sand back, treat, and seal. Once metal is perforated, proper repair means cutting out the rusted rocker/lower-quarter metal, welding in new metal or a repair/rocker panel formed to fit flush, then rust-proofing, filler, paint and clear coat; cosmetic blending across body lines (and any OEM stripe replacement) adds cost. Always remove the trapped foam during any repair so the rust does not return. Preventatively, owners recommend an annual oil-based undercoating/cavity treatment and washing the underbody after winter salt exposure.
What you need to fix it
Only diagnosis- and fitment-reviewed repair parts are linked here.
3M 08852 Cavity Wax Plus aerosol
Protect clean, dry interior rocker and lower-quarter cavities after trapped foam/debris is removed, drains are opened and any structural rust repair is completed Fitment: Universal professional collision-repair material, not Challenger f…
3M 08851 applicator kit with 8-, 24- and 34-inch wands
Companion tool to deliver 08852 through concealed rocker/dogleg cavities with 360-degree coverage Fitment: Universal shop tool made specifically for 3M 08852; use access openings safely and keep drains/weep holes clear $32.95, 33 on hand…
Fluid Film AS11 clear lanolin-based aerosol
Creeping-oil/annual-maintenance branch for non-structural interior cavities and underbody surfaces after cleaning and drying Fitment: Universal coating rather than a replacement panel. Keep it off braking surfaces, exhaust/catalyst heat …
Fluid Film AS11B black corrosion-protection aerosol
Black-tint alternative for visible underbody/rocker maintenance after cleaning and rust assessment Fitment: Universal coating with the same structural limits as clear Fluid Film; do not use cosmetic coating to conceal perforation or unsa…
As an Amazon Associate, we earn from qualifying purchases; other part links may also earn au7o a commission. Confirm fitment by VIN before buying.
Challengers equipped with the optional power sunroof are a recurring subject of dedicated water-leak threads on the major owners' forums (ChallengerTalk, HellCat.org) and show up in TrueDelta body/integrity problem histories. The sunroof tray drains to four corner drain tubes (two front, two rear) that run down the A-pillars and rear pillars. Over time these tubes clog with pine needles, pollen, dirt and other road/yard debris, or a drain hose that was crimped/misrouted between the roof and a headliner support seals itself shut from heat cycling. When the drains can no longer carry the tray water away, it overflows and tracks along the headliner before dripping out the lowest point inside the cabin — most commonly the overhead console near the dome lights and HomeLink buttons, dribbling down onto the shifter plate (owners describe finding "half a cup" of water on the console). On some cars the leak is instead a failed or torn sunroof-glass weatherstrip that lets water past during rain or high-pressure car washes. Left unaddressed, the standing water can stain the headliner, soak the carpet/footwells, breed mildew, and reach interior electronics. It is a preventable maintenance/condition issue rather than a widespread defect, but it is a very common ownership question.
Common Symptoms
Water dripping from the overhead console near the dome lights / HomeLink buttons onto the shifter
Damp or stained headliner
Wet carpet or standing water in the front footwells
Water stains running down the A-pillar trim
Musty or mildew smell in the cabin
Puddle on the center console after rain or a car wash
Gurgling/trickling water sound from the roof when driving after rain
How to Fix
Diagnose first: open the sunroof and inspect all four corner drains with a flashlight — it only takes one small leaf to back up a drain. Clear each tube by feeding flexible nylon string-trimmer (weed-eater) line down the drain; the line follows the contour without tearing the hose. Do NOT use a metal coat hanger or stiff wire, which can puncture or split the drain tube. For stubborn blockages, drop the front edge of the headliner, disconnect the drain hoses, and blow them clear with LOW-pressure compressed air (high pressure can pop the hose off its nipple inside the roof). Clean any debris sitting in the sunroof tray and around the drain holes. Pour a little water into the open tray afterward and confirm it exits at the rocker/wheel-well outlets. If the drains are clear but it still leaks during rain or a wash, inspect the sunroof-glass weatherstrip for tears or shrinkage and replace the seal (or, in severe cases, the sunroof glass assembly). After any leak, dry the headliner and carpet thoroughly to prevent mold. Routine prevention: flush the drains each spring and fall, especially if parked under trees. DIY parts cost is essentially $0 (trimmer line); a shop drain cleaning runs roughly $100-$150, full leak repair $100-$400 depending on whether a seal/glass is needed, and water-damaged headliner replacement adds $100-$300+.
What you need to fix it
Only diagnosis- and fitment-reviewed repair parts are linked here.
Genuine Mopar 5112805AC front left/driver-side sunroof drain tube
Replace only when inspection behind the headliner proves the front left tube is torn, pinched, detached or cannot be cleared Fitment: Live exact fitment lists 2008-2023 Challenger and supersedes 5112805AA/AB $29.88 and Add to Cart on the…
Rear-left replacement branch after inspection proves a torn, detached or blocked-beyond-recovery hose Fitment: Live exact fitment lists 2011-2023 Challenger, not 2008-2023 as the old record claimed; 2008-2010 rear-hose fitment remains VI…
Early rear-right hose branch after location-specific diagnosis Fitment: Live exact fitment lists 2011-2014 Challenger; do not use the later 68185518AB simply because both are passenger-side rear drains $6.59 and Add to Cart on the live O…
Later rear-right hose replacement after the specific hose is confirmed damaged Fitment: Live exact fitment lists 2015-2023 Challenger; it does not cover 2008-2014 $29.88 and Add to Cart on the live OEM product page when checked
Replace only when the drain trough or its integrated foam/weatherstrip is physically failed after all four drains and hose connections test correctly Fitment: Live exact fitment lists 2008-2023 Challenger and supersedes 5137559AC; this i…
Genuine Mopar 68301072AA sunroof glass assembly with bonded perimeter weatherstrip
Last-resort replacement when drains, hoses and alignment are correct but the glass's non-serviceable bonded weatherstrip is torn, brittle or separated Fitment: Live catalog lists 2008-2010 and 2012-2023 Challenger; 2011 is omitted/incons…
Owners of final-year (2023) Dodge Challengers report windshields that crack spontaneously originating at or near the A-pillar, frequently with no visible chip or impact point. A recurring pattern: a crack roughly 6-10 inches long that begins partway up the A-pillar (often the passenger side) and runs diagonally toward the center/driver's side. Multiple owners describe the crack appearing during normal low-stress events such as backing out of a garage or pulling out of a driveway, sometimes on cars only weeks old with a few hundred miles. The forum consensus points to a manufacturing/installation defect rather than a road-debris strike. Two leading theories are documented: (1) insufficient or missing urethane bonding at the factory — some assembly-line cars reportedly went through without proper robot-applied glue — and (2) an off-center / poorly seated windshield (set too far to one side), which leaves a gap between the right A-pillar and the glass that lets water and road debris intrude and creates an uneven bond. Either condition lets the unibody flex transmit stress into the glass edge, so a minor jolt (e.g., a small pothole) propagates an edge crack. The off-center mounting and seal gaps are the source of the associated wind-noise and water-leak complaints. This is distinct from the separate Challenger sunroof/water-leak issues — here the leak path is the windshield perimeter seal itself. The defect appears concentrated in 2023 (the model's final production year) and is reported across trims from V6 SXT/GT up to the Hellcat/Jailbreak, since they share the same windshield and assembly process. Real-world prevalence is hard to quantify: owners note that despite heavy forum chatter, very few have filed NHTSA complaints, so there is no recall or formal investigation.
Crack starts at or near the A-pillar with no visible chip or impact point
Diagonal crack roughly 6-10 inches long running from the A-pillar toward the center/driver side
Windshield cracks spontaneously during low-stress events (backing out of garage, pulling out of driveway)
Cracking on a nearly new car (weeks old, a few hundred miles)
Windshield visibly set off-center, with a gap between the right A-pillar trim and the glass
Wind noise around the upper windshield/A-pillar at speed
Water leak or moisture/debris entry along the windshield perimeter seal
Creaking from chassis flex felt or heard near the windshield/cowl
Repeat cracking after replacement if the new glass is not re-centered and properly bonded
How to Fix
First, document the failure: photograph the crack's origin at the A-pillar and note the absence of any chip/impact point, since a clean edge-origin crack with no strike supports a warranty/defect claim rather than road damage. Take the car to a Dodge dealer and request inspection under the new-vehicle (3-year/36,000-mile) basic warranty — dealers have seen this pattern and some have replaced the glass and re-set it under warranty. If the windshield was set off-center, insist the replacement be properly centered and fully bonded so the right-pillar gap, wind noise, and water-leak path are eliminated; ask the installer to confirm full urethane bead coverage. If the dealer declines warranty coverage (commonly treating glass as wear/road-damage), the practical route is a comprehensive insurance glass claim — comprehensive typically covers windshield replacement with little or no rate impact, and many states waive the deductible for glass. Use OEM or high-quality OEM-equivalent glass and a reputable installer who follows the urethane safe-drive-away time, because re-using a marginal install simply repeats the crack. Several owners report multiple replacements, so verifying centering and bond quality on the replacement is the key to a permanent fix. A dealer-added windshield protection plan (some carry a multi-year road-damage warranty) can offset future cost. There are no electronic diagnostics or DTCs involved; this is purely a glass/body inspection and replacement repair.
The factory plastic-tank radiators on Challengers are prone to cracking and leaking, especially under spirited driving or in hot climates. The crimped plastic end tanks can fail at the seams. Many owners report needing radiator replacements between 60,000-100,000 miles.
Replace with an all-aluminum aftermarket radiator for long-term reliability. Mishimoto, Champion, and CSF offer direct-fit aluminum radiators with lifetime warranties. Also inspect radiator hoses and clamps during replacement. Consider adding a larger fan or oil cooler if tracking the car.
What you need to fix it
Only diagnosis- and fitment-reviewed repair parts are linked here.
Genuine Mopar 68050126AB engine-cooling radiator
Factory-style replacement after pressure testing confirms a radiator seam, core or tank leak Fitment: Live year-specific catalogs assign this part to 3.6L without severe duty and 5.7L heavy-duty configurations; the broad direct-product f…
Durability/performance upgrade branch when the owner chooses an all-aluminum replacement for a confirmed failed factory radiator Fitment: Manufacturer direct fit explicitly covers 2009-2016 Challenger 5.7L, which is only the 2011-2016 su…
As an Amazon Associate, we earn from qualifying purchases; other part links may also earn au7o a commission. Confirm fitment by VIN before buying.
High ConfidenceVerified412 owner reportsLast reported by owners Feb 2024Reviewed Aug 2026
The mechanical (belt-driven) water pump on HEMI-powered Challengers is a recurring weak point that can fail well before normal service life, with owners reporting failures across a very wide mileage band — some as early as ~5,800-7,000 miles, clusters around 18,000-25,000 miles, and others out past 45,000-60,000 miles. The OEM Mopar pump uses a plastic impeller pressed onto a sealed bearing-and-shaft assembly. The dominant failure mode is bearing wear: as the bearing develops play and roughness, the shaft seal weeps coolant (a telltale trail of dried/crusty glycol residue on the pump body, distinct from harmless minor weep-hole staining), and in worse cases the loose impeller rubs the inside of the timing-cover/block bore, shearing plastic vanes off the impeller. Shed plastic circulates into the cooling system while the now-degraded impeller stops moving coolant effectively, producing localized overheating that can escalate to engine damage. This is a distinct component and failure set from the separately documented OEM radiator cooling issue — same system, different part. Dodge's own DodgeGarage how-to acknowledges the inspection points (loose/rough bearing and seal-deposit trail), and many owners and some dealers treat it as a known HEMI weak spot. A common, well-regarded fix is replacing the OEM plastic-impeller pump with a metal-impeller aftermarket unit (e.g., Gates) rather than another identical OEM pump.
Coolant leak / drip at front of engine with dried crusty glycol residue trail on the water pump body
Low coolant level and coolant smell after driving
Growl, squeal, or frog-croak-like bearing noise from the front of the engine
Play or roughness felt when rocking/spinning the water pump pulley
Gradually rising coolant temperature gauge
Engine overheating (when impeller fails and stops circulating coolant)
Bits of shed plastic found in coolant / cooling system after impeller breaks up
Often no check-engine light in early stages
How to Fix
Diagnose first: with the engine off, check the water-pump pulley/shaft for play (rock it) and spin for roughness/grinding; inspect the pump body for a dried, thick glycol deposit trail (sign of a failed shaft seal — replacement is required), as distinct from a harmless light stain at the weep hole. Listen for a growl, squeal, or "frog-croak" bearing noise from the front of the engine, and watch for slowly rising coolant temp or a coolant smell. The repair is replacement of the water pump (the pump is not serviceable). When replacing, many owners and shops recommend a metal-impeller aftermarket pump (e.g., Gates) instead of another OEM plastic-impeller Mopar unit to avoid a repeat failure. Replace the thermostat and any brittle gaskets/hoses at the same time, refill with the correct OAT coolant, and bleed the system. If the impeller shed plastic before replacement, flush the cooling system thoroughly and inspect the radiator/thermostat for debris. Torque the pump mounting bolts to ~18 ft-lb on HEMI applications (verify per year/engine). Caught early (seal weep / bearing noise, no overheating), it is a straightforward cooling repair; caught late (impeller failure + overheat), it risks downstream engine damage — hence prompt attention to bearing noise or coolant loss.
What you need to fix it
Only diagnosis- and fitment-reviewed repair parts are linked here.
Genuine Mopar 53022095AJ engine water pump
Early 5.7L water-pump replacement after pulley play, bearing roughness or a pump-origin coolant leak is confirmed Fitment: Exact live fitment lists 2009-2010 Challenger R/T 5.7L and supersedes 53022095AF; it does not cover the 6.1L or la…
Hellcat/Demon/Redeye engine water-pump branch after diagnosis distinguishes the engine pump from the separate low-temperature intercooler circuit and its auxiliary pump Fitment: Exact live fitment lists 2015-2023 Challenger 6.2L and supe…
Conditional thermostat replacement during a confirmed water-pump repair when testing, age/condition or the service procedure justifies it Fitment: Live fitment lists 2008-2023 Challenger 5.7L/6.1L/6.2L/6.4L and supersedes 52028898AE/AI; …
Later-model refill after a confirmed pump repair when the VIN/build specification calls for Mopar OAT Fitment: Official page identifies 2012-2024 Mopar OAT concentrate but publishes no vehicle-fitment table; confirm the exact Challenger …
As an Amazon Associate, we earn from qualifying purchases; other part links may also earn au7o a commission. Confirm fitment by VIN before buying.
A P0420 ("Catalyst System Efficiency Below Threshold, Bank 1") or P0430 ("Bank 2") check-engine light is one of the most common emissions codes on the Dodge Challenger, especially on higher-mileage V8 cars. The PCM sets the code when it compares the upstream (pre-cat) and downstream (post-cat) oxygen-sensor signals: if the downstream sensor begins to mimic the rapidly-switching upstream sensor instead of staying relatively flat, the computer concludes the converter is no longer storing/releasing oxygen efficiently. On the Challenger this code is frequently NOT a worn-out converter at all. The two most common upstream root causes are (1) an exhaust leak from broken exhaust-manifold bolts — the well-documented "HEMI tick" on the 5.7L and 6.4L V8s — which lets atmospheric oxygen into the exhaust stream and confuses the rear O2 sensor, and (2) a long-running misfire (worn plugs, failing coils, leaking injectors on the 3.6L Pentastar) that dumps raw fuel into the converter and physically destroys it over time. A failed downstream O2 sensor, contaminated converter (from an oil-cooler/oil-filter-housing leak on the Pentastar), or simply an aged/degraded cat round out the causes. Chrysler also issued software bulletins (TSB 18-021-12, superseded by 18-033-13) because early PCM calibration logic was overly sensitive and could trigger false P0420/P0430 codes — particularly in warm weather or on long highway drives — so a PCM reflash should be ruled out before any hardware is replaced. Because the converter sits in the federal/CARB emissions-warranty window for many of these cars, the diagnosis order matters a lot to the owner's wallet.
Check Engine Light on with stored code P0420 (Bank 1) and/or P0430 (Bank 2)
Vehicle may run normally with no obvious driveability change at first
Failed state emissions / smog inspection
Possible rotten-egg (sulfur) smell from a degrading converter
Slight loss of power or fuel economy if the converter is partially clogged
Often accompanied by a cold-start exhaust tick (broken manifold bolts) on the V8
Code returns shortly after clearing if root cause is not fixed
How to Fix
Diagnose before you spend. (1) Pull all stored codes first — if any misfire (P0300-P030x) or O2-sensor codes are also present, fix those first, since a misfire will quickly kill a new converter. (2) Inspect for exhaust leaks, especially broken exhaust-manifold bolts on the 5.7L/6.4L V8 (look for soot/ticking at the manifold flanges); repair the leak and clear the code before condemning the cat — a manifold leak is a very common false-trigger of P0420 on the HEMI. (3) Check for a PCM software update at the dealer per TSB 18-021-12 / 18-033-13, which addresses incorrectly-set P0420/P0430 codes. (4) Graph the oxygen sensors with a scan tool: the downstream (Bank 1 Sensor 2 / Bank 2 Sensor 2) signal should be slow and steady; if it copies the fast-switching upstream sensor, the converter is failed. A failing downstream O2 sensor is a much cheaper part to try than a converter. (5) Only after ruling out leaks, misfires, software and sensors should the catalytic converter be replaced. Use an OEM Mopar or quality CARB-compliant aftermarket (e.g., MagnaFlow) unit; cheap universal cats often re-trigger the code. On the 3.6L Pentastar, also confirm the oil-filter-housing/oil-cooler is not leaking oil into the system, as that contamination will destroy a new converter. Note: the converter is covered under the federal 8-year/80,000-mile emissions warranty (and 15-year/150,000-mile in California) on many of these model years — check before paying out of pocket.
What you need to fix it
Only diagnosis- and fitment-reviewed repair parts are linked here.
OBDLink MX+ Bluetooth OBD-II adapter with included apps
Graph upstream and downstream oxygen-sensor behavior and fuel-trim data after misfires and exhaust leaks are repaired, before condemning a converter Fitment: Generic OBD-II live-data tool; confirm the app exposes the required PIDs on the…
Genuine Mopar 5149180AB oxygen sensor
Sensor branch only when waveform, heater-circuit and wiring tests identify the exact failed sensor rather than converter inefficiency Fitment: Live fitment lists 2011-2023 Challenger 3.6L/5.7L/6.2L/6.4L, but catalog position varies by ye…
Confirm engine family and local emissions rules $911.90 with Add to Cart on the live US retailer page when checked
Genuine Mopar 6509863AA exhaust-manifold stud
Repair an identified 5.7L manifold fastener leak before evaluating converter efficiency again Fitment: 2009-2020 Challenger 5.7L side-position stud, sold individually; other engines and positions require their own hardware $11.65 and Add…
Reseal a confirmed 5.7L manifold-to-head leak before interpreting catalyst-monitor data Fitment: 5.7L HEMI branch only after vehicle fitment confirmation; not the 6.1L/6.2L/6.4L gasket $56.99 and Add to Cart on the live AutoZone US produ…
The Dodge Challenger's evaporative emissions (EVAP) leak-detection device — the Evaporative System Integrity Module/Monitor (ESIM), the successor to Chrysler's older NVLD (Natural Vacuum Leak Detection) pump — is a very common failure point across the LX/LA platform (2008-2023). The ESIM is a mechanical, non-solenoid device (housing, two check valves/weights, a diaphragm, and a switch) bolted to the charcoal canister behind the rear passenger fender-well liner. It performs an engine-off non-intrusive test for small leaks and an engine-running test for medium/large leaks, and the PCM relies on it for ALL EVAP leak diagnostics. When the ESIM's diaphragm or switch fails, the PCM falsely concludes the sealed EVAP system is leaking and sets P0456 (small leak), P0455 (large leak), or a generic P0440, illuminating the check-engine light. Because the code description points to a leak, the part is repeatedly misdiagnosed: owners and shops replace the gas cap (sometimes multiple times), get a clean smoke test showing no actual leak, yet the code returns. Multiple forum threads document owners chasing this for months — replacing the gas cap, then the purge/canister valve — before the ESIM ("vapor leak detection pump") is finally identified as the real fault. One owner reported spending roughly $2,500 over repeated visits before the issue was resolved. In some cases the leak-detection pump was simply found unplugged behind the wheel-well liner.
Check-engine light (MIL) on with no driveability problems
P0456 (small EVAP leak), P0455 (large EVAP leak), or P0440 stored, sometimes intermittently together
Code returns shortly after clearing or after replacing the gas cap
Smoke test shows no actual leak yet the code persists
Gas-cap / 'tighten fuel cap' warning message that won't clear
Faint fuel-vapor smell in some cases
May cause an emissions/inspection test failure
How to Fix
Don't just keep replacing the gas cap. First inspect/tighten the cap and, if replacing, use only an OEM Mopar cap (e.g., P/N 52030377AB) since aftermarket caps frequently re-trigger the code. Then have a smoke test performed: if the smoke test shows NO leak but P0455/P0456/P0440 persist, the ESIM (leak detection pump) itself is the cause and should be replaced. The ESIM is located on the charcoal canister behind the rear passenger-side fender-well liner. DIY replacement takes roughly 40-45 minutes: a 22mm socket to pull the rear wheel, a clip/push-pin tool plus a 10mm socket to pull the liner, then unclip and swap the module. Also confirm the ESIM electrical connector is fully seated — several owners found it unplugged. After replacement, clear the codes and complete a drive cycle so the EVAP monitor can re-run and verify the fix. The ESIM part itself is inexpensive (~$25-$90 OEM/aftermarket, e.g., APDTY 160319), making this a low-cost DIY repair; a shop diagnosis-plus-replacement typically runs $100-$500 (dealer quotes can reach ~$800).
What you need to fix it
Only diagnosis- and fitment-reviewed repair parts are linked here.
Genuine Mopar 4861962AD Evaporative System Integrity Module
Replace the ESIM after cap/connector inspection and a smoke test shows no external leak but the EVAP monitor still implicates the module Fitment: Live fitment lists 2008-2023 Challenger 3.5L, 3.6L, 5.7L, 6.1L, 6.2L and 6.4L; supersedes 4…
Early-car cap branch when seal inspection confirms the cap itself is leaking or damaged Fitment: 2008-2010 Challenger 3.5L/5.7L/6.1L only; the solution's example 52030377AB should not be treated as the universal Challenger number $31.46 …
Later cap branch only when inspection or smoke testing identifies the cap seal as the leak Fitment: 2011-2019 Challenger; supersedes 68139752AA and 52030389AA $26.62 and Add to Cart on the live OEM product page when checked
The ZF 8HP45/8HP70 8-speed automatic suffers from harsh downshifts (especially 2nd to 1st), rough upshifts with RPM spikes, and clunking when cold. Ferrous or aluminum debris in 3-4 shift pressure valves is the primary failure point. Valve body is the most common component needing replacement.
Ensure TCM updated to latest software. Change fluid every 50,000 miles despite 'sealed for life' claim using Mopar 8&9 speed ATF (68218925AA) or ZF Lifeguard 8. Valve body replacement for persistent harsh shifting. Perform QuickLearn procedure after any transmission work.
High Confidence300 owner reportsLast reported by owners Aug 2025Reviewed Feb 2026
Dodge Challenger owners across the LC/LA platform (2008-2023) commonly report the A/C not blowing cold, blowing warm/weak, or one side of the cabin staying warm. The complaints split into two distinct failure clusters that share the same symptom.
CLUSTER 1 - Refrigerant/AC-system side: Low refrigerant from slow leaks is the most-cited cause of weak or warm cooling. Owners also report A/C-system component failures including a failed expansion valve (multiple Scat Pack owners had the expansion valve replaced, several under warranty, which restored cold air), evaporator/condenser icing-up that an A/C shop resolved by evacuating the system, replacing the receiver/drier and recharging, A/C compressor failure, and condenser damage. A clogged or leaking evaporator never gets enough refrigerant to cool the air. A dirty cabin air filter reduces airflow (air is still cold, just weak).
CLUSTER 2 - Blend-door / mode-door actuator side: This is the signature Challenger HVAC complaint. The dash-mounted plastic blend-door actuator strips its internal gear teeth and produces a repetitive clicking/tapping sound from behind the dash (often loudest when changing temperature or after start-up), the temperature gets stuck (heat stuck on, or A/C feels weak in hot climates because any leakage from the hot/heater side bleeds into the duct), and in dual-zone cars one side blows cold while the other blows warm. The Challenger uses multiple actuators: on the driver's side the upper unit is the blend/temperature actuator and the lower unit is the mode (vent/floor/defrost) door actuator; dual-zone Automatic Temperature Control cars add passenger-side actuator(s) for the second zone. The actuators are interchangeable across the positions. Forum consensus strongly favors genuine Mopar/OE actuators - aftermarket units are widely reported as DOA out of the box or failing within months. The blend door's plastic gear itself can also strip teeth or break, so an actuator swap does not always cure it. Affects the full LC generation (2008-2014) and the facelift cars (2015-2023) across all engines and trims; severity is medium - it is a comfort/seasonal issue, not safety-critical, but defrost loss can be a winter-visibility concern.
Common Symptoms
A/C blows warm or only mildly cool air
A/C cooling is weak even on max
Repetitive clicking or tapping sound from behind the dashboard, often when changing temperature
Temperature stuck - heat stuck on or won't get cold
One side of the cabin blows cold while the other blows warm (dual-zone cars)
Cannot switch between defrost, dash, and floor vents (mode door)
Reduced airflow from vents (dirty cabin filter)
Evaporator/condenser icing up then blowing warm
How to Fix
Diagnose which cluster you are in before spending money. First confirm the controls (temp not accidentally set to hot, vents open) and check/replace the cabin air filter if airflow is merely weak. Then have the A/C system pressure-tested: if refrigerant is low, find and fix the leak (commonly the expansion valve, evaporator, condenser, or O-rings) and recharge - a recharge alone without finding the leak is a temporary fix. A failed expansion valve, compressor, or evaporator requires component replacement and an evacuate/recharge; replacing the receiver/drier and orifice/expansion valve at the same time is recommended to protect new parts.
If the symptom is the clicking sound, stuck temperature, or one warm side, the fix is the blend-door (temperature) or mode-door actuator. Identify the failed actuator by cycling temperature and mode while listening for the click, then replace it - use a genuine Mopar/OE actuator (interchange/replaced part numbers include 68031977AA, 68033337AA, 68238243AA, and Dorman 604-024). On many positions the actuator is reachable behind the dash, but some require partial instrument-panel removal and separating the HVAC housing, which is labor-intensive. If a new actuator still clicks or sticks, inspect the blend door gear itself, which can strip or break; recalibrate by removing the actuator, resetting the door to its default position, and reinstalling carefully so the gears mesh.
DIY part cost for an actuator is roughly $35-100; a typical shop blend/air-door actuator replacement runs about $239-284, more if deep dash disassembly is needed. There is no HVAC-specific recall; TSB 24-008-14 addresses a separate 2015 blower-motor-cutout-on-high condition via control-module reprogramming.
What you need to fix it
Only diagnosis- and fitment-reviewed repair parts are linked here.
Genuine Mopar 68299450AA A/C and heater door actuator
Clicking, stuck-temperature or one-side-warm branch after actuator command testing isolates the failed position Fitment: Live fitment lists 2008-2023 Challenger, but multiple HVAC doors and the control head can create similar symptoms; i…
Early-car refrigerant restriction/pressure-pattern branch after leak and pressure diagnosis Fitment: 2008-2010 Challenger 3.5L, 5.7L and 6.1L; the system must be professionally recovered, evacuated, leak-tested and recharged, with new co…
Genuine Mopar 68238028AB A/C expansion valve, O-rings and clamp
Later-car expansion-valve branch after pressure readings and leak inspection point to the valve Fitment: 2014-2023 Challenger 3.6L, 5.7L, 6.2L and 6.4L; this does not cover the unresolved 2011-2013 catalog gap $78.64 and Add to Cart on t…
V6 compressor branch only after pressures, clutch/command, oil condition and leak diagnosis confirm compressor failure Fitment: 2015-2023 Challenger 3.6L only; V8s and 2008-2014 vehicles require their own VIN-confirmed compressor $912.95…
Early-car evaporator branch after leak testing directly confirms a leaking core Fitment: 2008-2010 Challenger 3.5L, 5.7L and 6.1L only; substantial dash/HVAC-case labor and professional refrigerant handling are required $296.59 and Add t…
Genuine Mopar 68071668AA cabin-air filter, superseded by 68535614AA
Restricted-airflow branch when blower speed is normal but vent volume is weak Fitment: 2011-2020 Challenger; this filter cannot repair warm air with normal airflow and is not evidence of a refrigerant fault $25.63 and Add to Cart on the …
Dodge Challenger owners frequently report front brake "warping" that produces a noticeable pulsation through the brake pedal and a shimmy in the steering wheel under braking, often accompanied by faster-than-expected front pad wear. The complaint surfaces at surprisingly low mileage — CarComplaints documents reports beginning around 6,500 miles, with the 2012 model year's "Rotors Warped" category averaging failure at roughly 15,400 miles across 10 complaints (rated 7.6/10 "pretty bad"). The condition is recurring for many owners: one report describes warping at 4,000 miles, again at 15,000, and a third time by 23,000, while another required resurfacing every 4,000-5,000 miles. While owners describe it as "warped rotors," the technical root cause is usually one of two mechanisms, and often a combination: (1) genuine thermal distortion/excessive lateral runout of the rotor, and (2) uneven brake-pad material transfer (friction-material deposits) that builds up on part of the rotor face and creates a thickness variation the driver feels as pulsation. The Challenger is a heavy car (roughly 3,800-4,500+ lb depending on trim/engine), and that mass plus spirited or aggressive braking loads the front rotors hard, accelerating runout and uneven pad deposition. Contributing factors include hard braking from high speed, riding the brakes in traffic, improper/uneven lug-nut torque, a sticking caliper applying uneven pressure, worn wheel bearings, and — very commonly — improper pad bed-in (break-in) that seeds uneven deposits from the start. Brembo-equipped performance trims (SRT8/392/Scat Pack/Hellcat) are not immune and carry far higher parts cost. The issue is a comfort/serviceability and longevity concern rather than a sudden safety failure, hence MEDIUM severity, but it drives repeat brake service and strong owner intent to buy replacement rotors and pads.
Pulsation or vibration felt through the brake pedal when braking, especially at highway speed
Steering wheel shimmy or shaking under braking
Vibration felt through the whole car when slowing down
Pulsation that starts subtle and progressively worsens, often after a long drive
Front pads wearing out faster than expected
Reduced/poor stopping power at low mileage
Recurring warping that returns a few thousand miles after resurfacing
Brake noise (squeal, squeak, or scraping) and visible scoring or uneven wear on the rotor face
How to Fix
Have a shop measure rotor lateral runout and thickness variation (DTV) with a dial indicator before assuming "warp." If the rotors are within spec and the problem is uneven pad-material transfer, an aggressive re-bedding procedure with new (or properly cleaned) pads can sometimes restore smooth braking. More commonly the lasting fix is to replace the front rotors and pads as a set rather than repeatedly resurfacing — owners who only resurface report the pulsation returning within a few thousand miles. Choose properly metallurgically-spec'd rotors (quality cast/balanced units; for spirited or track use, vented/slotted performance rotors and higher-temp pad compounds resist deposition and thermal distortion better) and ALWAYS perform the manufacturer/pad-maker bed-in procedure correctly to lay down an even transfer layer. During the job, verify and properly torque lug nuts with a torque wrench in a star pattern, confirm calipers are not sticking (clean/lube slide pins, inspect pistons), and check wheel bearings. Standard front pad replacement runs roughly $213-$487 per axle at a shop; a quality aftermarket front rotor-and-pad kit is about $128-$300 in parts (e.g., cross-drilled/slotted rotors with ceramic pads, ~$128+), making DIY very economical. Note that Brembo-equipped performance trims (SRT/Scat Pack/Hellcat) can cost dramatically more — owners cite dealer quotes of $4,500+ per axle for OEM Brembo fronts — so aftermarket replacements are especially attractive on those cars. Many early-mileage cases were covered under the 12-month/12,000-mile warranty when reported promptly.
What you need to fix it
Only diagnosis- and fitment-reviewed repair parts are linked here.
Genuine Mopar 68368065AA front brake rotor
Replacement rotor after runout/thickness variation confirms the rotor cannot be corrected within specification Fitment: 2009-2023 Challenger only when VIN/brake sales code identifies the standard/heavy-duty non-Brembo rotor; sold individ…
Four-piston Brembo rotor branch after brake-package confirmation Fitment: 2021-2023 Challenger RWD with four-piston Brembo front calipers; sold individually and not interchangeable with six-piston directional rotors $166.50 and Add to Ca…
Earlier Brembo-equipped performance-trim replacement branch Fitment: 2015-2020 Challenger only after VIN and brake sales code confirm this rotor; sold individually and supersedes 68184587AB/AC/AD $932.80 and Add to Cart on the live OEM p…
Standard-brake pad set to install with the matching axle pair of rotors Fitment: Challenger standard/non-Brembo brake sales-code applications; the live direct table is broader than year diagrams, so VIN/brake code must be checked $97.88 …
Performance-brake pad branch to match the installed caliper/rotor package Fitment: 2015-2020 Challenger with brake sales code BR7; do not infer fitment from trim name alone $171.00 and Add to Cart on the live OEM product page when checked
The Dodge Challenger has two distinct, well-documented power-steering complaints on the pre-2015 LC/LX-platform cars, and both are flagged by RepairPal as common problems (MotorBiscuit lists "a loud power steering system" among the four most-reported Challenger issues). FIRST, a HYDRAULIC NOISE: owners hear a honk, hiss, groan, or whine from the steering during low-speed parking-lot maneuvers, worst when turning the wheel toward full lock. RepairPal documents this as a recognized concern on 2008-2012 Challengers; Chrysler addressed it with TSB 19-005-10 ("Steering Gear Honk, Hiss or Groan During Low Speed Parking Lot Maneuvers," superseding 19-003-09), which traces the noise to the power-steering return hose and, in some cases, the steering gear (rack). Fluid aeration, a low or contaminated fluid level, and worn pump vanes/bearings produce the same groan/whine. SECOND, an ASSIST-LOSS failure on EHPS cars: 2011-2014 Challengers with the 3.6L Pentastar or 5.7L HEMI use an electro-hydraulic power-steering (EHPS) pump that depends on the charging system. Under NHTSA recall 17V-435 (Chrysler recall T36, ~442,214 vehicles across Challenger/Charger/300/Durango/Grand Cherokee), the alternator can suffer diode thermal fatigue specifically because of the cyclical electrical loads the EHPS pump imposes; when the diodes fail, system voltage drops, the EHPS pump shuts down, the steering goes heavy, and the vehicle can stall without warning (failed diodes can also short and cause heat/smoke/fire). Note the engine/fluid split: 3.6L/5.7L EHPS cars require Mopar Electric Power Steering Fluid, while the conventional hydraulic SRT8/392 (6.1L/6.4L) and base V6 systems use ATF+4 — using the wrong fluid causes noise, seal damage, and pump failure. This entry is distinct from the later electronic-EPS-rack failure on the 2015+ refreshed Challenger (recalls S19/16V-167 and VB8/19V-812), which is a different rack design and root cause.
Honk, hiss, or groan from the steering during low-speed parking-lot maneuvers (worst near full lock)
Whining noise from the power-steering pump that rises with engine RPM or when turning
Heavy/hard steering at low speed
Sudden loss of power-steering assist (EHPS cars) accompanied by a charging-system or voltage warning
Vehicle stalls without warning (alternator diode failure on EHPS cars)
Burning smell, smoke, or smell of electrical heat from the engine bay (failed alternator diodes shorting)
Foamy or low power-steering fluid
How to Fix
For the low-speed honk/hiss/groan: start cheap. Verify the power-steering fluid level and condition and use the CORRECT fluid for your system — Mopar Electric Power Steering Fluid for 3.6L/5.7L EHPS cars, ATF+4 for conventional hydraulic SRT8/392 (6.1L/6.4L) and base hydraulic systems. A fluid flush/bleed to purge trapped air often quiets the noise (DIY fluid is ~$5-10/qt, ~2 qt; shop fluid service starts around $111). If the noise persists, follow TSB 19-005-10 and replace the power-steering RETURN HOSE first; if that does not cure it, the steering gear (rack and pinion) is the next step (Challenger rack-and-pinion replacement averages roughly $2,057-$2,372). A worn pump that whines/groans constantly may need replacement (Challenger power-steering pump replacement averages about $1,347-$2,122, with simpler jobs starting near $327). For the EHPS assist-loss / alternator issue on 2011-2014 3.6L/5.7L cars: check your VIN at nhtsa.gov for recall 17V-435 (Chrysler T36) — the alternator is replaced FREE with an improved-diode unit; if a "Power Steering" or charging/voltage warning appears or steering suddenly goes heavy, do not ignore it because the car can stall. Contact FCA at 1-800-853-1403 (reference T36) or NHTSA at 1-888-327-4236. After any rack or steering-angle-related work, a steering-angle-sensor recalibration may be required.
Owners of first-generation (LC-platform, 2008-2014) Dodge Challengers report the soft-touch top dashboard panel cracking or splitting open without any impact damage. The most-cited case is a 2009 SRT8 whose dash developed a 4-to-6 inch split on the top cover near the passenger side, close to the windshield (above the glovebox/airbag area); other owners report a roughly 1-inch crack appearing suddenly on the top of the dash between the steering wheel and the windshield, and some describe the dash "bulging" or separating at the seams. The cracking is a cosmetic defect in the dashboard's molded plastic/polyurethane skin and underlying foam. The widely accepted cause is long-term UV/sun exposure and repeated heat cycling, which embrittles and shrinks the dash material until it splits — the same dash-material weakness Dodge/Chrysler is known for across the Ram truck line. It is not a safety or driveability problem (no airbag-deployment or structural concern is documented for the Challenger), but it is an unsightly, recurring ownership complaint. Dodge/Chrysler has issued no recall, and owners report being told the factory warranty excludes interior plastic/trim parts, leaving repairs out of pocket. Cars parked outdoors in hot, sunny climates appear most affected, and the issue can show up at a wide range of mileages.
A 4-to-6 inch crack or split on the top of the dashboard near the passenger side, close to the windshield
A roughly 1-inch crack appearing suddenly on top of the dash between the steering wheel and the windshield
Dashboard top panel bulging, lifting, or separating at the seams
Cracking appears with no impact or accident, often after sun/heat exposure
Sharp or rough edges along the split in the dash material
Worsens over time and in hot, sunny climates
How to Fix
There is no recall and no factory fix; repair is at the owner's expense. The complete fix is replacing the OEM dashboard top pad/assembly, but this is the most expensive route (roughly $1,000+ for the part and labor, with full-assembly quotes climbing toward $3,000 depending on shop and whether the airbag/instrument panel must come out). Most owners choose a cover-up instead: (1) an ABS contoured dash cap (e.g., Coverlay) that snaps/adheres over the cracked panel for a near-OEM look (~$150-$250); (2) a custom-fit fabric/carpet dash cover (DashCare, Covercraft/DashMat, DashSkin) that lays over the dash and hides the crack while blocking UV and reducing heat (~$50-$120); or (3) professional vinyl re-skinning or flexible epoxy/filler repair by a mobile interior/detail shop (~$100-$200). Prevention is the same medicine: a UV-blocking dash cover or windshield sun shade and parking in shade slows or stops further cracking. Confirm exact dash part numbers and fitment by VIN before ordering, since pre- and post-2009 interiors differ in trim details.
What you need to fix it
Only diagnosis- and fitment-reviewed repair parts are linked here.
Exact-fit fabric-cover branch to hide an existing split or protect a still-intact pad without removing the instrument panel Fitment: 2008-2014 Challenger with model-specific vent and sensor cutouts; this is a cosmetic cover, not a struct…
UV/heat prevention for a replacement, repaired or still-intact dashboard Fitment: 2008-2014 Challenger exact windshield fit; it cannot repair an existing crack or re-bond lifted skin $116.95 on the live US retailer page when checked
A widely reported cosmetic complaint on the LX-platform Challenger (2008-2023) is premature clear-coat failure: the clear layer blisters, lifts, and peels away from the underlying color coat. It most commonly starts at high-exposure, hard-to-cover areas — the leading edge of the hood (where it meets the nose/fascia seam), the matte/satin roof strip, fascia panel seams, and above the rocker panels. Owners describe the color on the roof strip darkening (going greenish or chalky) before the clear coat lifts, and flaking that begins at a panel edge and spreads. The root cause is a thin and soft factory clear coat (owners report roughly ~2 mils of clear, which is on the low side), combined with UV exposure and heat cycling that degrade adhesion over years. Black and other dark colors (Pitch Black, Brilliant Black Pearl) absorb more heat and UV and are the most frequently affected; owners and detailers note the clear is "too soft" and chips/marrs easily. This is purely a paint/appearance problem — it does not affect drivability, safety, or mechanical function, hence LOW severity. It is one of the most common 'Dodge Challenger paint problems' searches. Note: a manufacturer paint warranty (typically 3 years/36,000 miles for finish on these years) sometimes covers it if caught early and if the failure is judged a defect rather than wear; many owners report dealers declining coverage on older/out-of-warranty cars, calling it environmental wear. A relevant TSB also warns that partial (spot/blend) clear-coat repairs can themselves delaminate, so the correct repair is to re-clear or repaint the entire affected panel.
Clear coat blistering, bubbling, or lifting at the leading edge of the hood where it meets the nose/fascia
Peeling or flaking clear coat on the satin/matte roof strip, often preceded by the strip darkening, going greenish, or turning chalky
Clear coat lifting above the rocker panels and along fascia/bumper seams
Cloudy, hazy, or milky-white patches where clear has separated from the color coat
Flaking that starts at a panel edge and spreads outward
Worse and earlier on black and dark-colored cars (Pitch Black / Brilliant Black Pearl)
Soft clear coat that chips, swirls, and marrs easily; heavy orange peel from the factory
How to Fix
Document the failure early with photos and the paint code (door-jamb sticker) and open a paint-warranty claim at a Dodge dealer while still within the 3-year/36,000-mile finish-warranty window — early, clearly-defective cases are sometimes covered. Out of warranty, the only durable fix is refinishing: strip the affected panel to a sound layer and re-spray base + clear over the ENTIRE panel (do not spot-blend clear, which delaminates per the TSB). Budget roughly $500-$1,000 for a single panel (e.g., hood or a fender), $1,500-$5,000 when several panels/clusters are involved, and around $8,000+ for a quality full-vehicle repaint in the factory color (more for color changes or body work, up to ~$10,000 for a strip-to-metal job). After refinishing — or on a sound car to prevent recurrence — protect the soft factory clear with paint protection film (PPF) on the leading edges (hood nose, fascia, rockers, roof strip), keep the car garaged/out of constant UV, wash with pH-neutral products, and apply a ceramic coating or sealant. Avoid aggressive wet-sanding of the factory finish: with only ~2 mils of clear, correction can leave the clear dangerously thin.
Many Challenger owners report that the fuel tank is hard to fill and the gas pump nozzle clicks off (shuts off) repeatedly before the tank is full, often with fuel backing up or spitting out of the filler neck. RepairPal lists this as one of the most-reported Challenger problems, with a dedicated problem page; in their data the complaints were concentrated on the 2008-2009 cars (5 owners reporting, around 65,000 miles average), but owner forums (ChallengerTalk, Hellcat.org) show the same premature-shutoff complaint persisting across later SXT, R/T, Scat Pack and SRT Hellcat models. The root cause is the EVAP (evaporative emissions) venting path that is supposed to let air/vapor escape the tank as fuel goes in. When that path is restricted, displaced vapor cannot vent, tank pressure rises, fuel backs up into the filler neck, and the nozzle's automatic shutoff senses 'full' prematurely. Specific culprits identified by RepairPal and dealer/diagnostic sources include a restricted or kinked vapor recirculation tube, a faulty fuel fill (filler) tube, a clogged EVAP fresh-air filter or vent line, and a malfunctioning EVAP canister vent/control valve. RepairPal also documents a saddle-style (two-half) tank design on some cars where an internal fuel-distribution/overfill mechanism malfunctions and trips the overfill sensor early, in which case the cure was a complete fuel tank replacement. On modern cars the same symptom frequently appears alongside EVAP fault codes (P0440, P0441, P0452), and a stuck or restricted purge/vent path is the first thing to check. The issue is overwhelmingly a fueling-station annoyance and slow-fill nuisance rather than a safety or driveability defect, which is why it rates LOW severity, though it is highly searchable because so many owners hit it at the pump.
Gas pump nozzle clicks off / shuts off repeatedly before the tank is full
Fuel tank is slow or hard to fill, must trickle gas in
Fuel spits back or burps out of the filler neck while fueling
Cannot fill the tank completely / gauge never reaches full
Premature 'full' shutoff even with the tank low
Check engine light with EVAP codes (on later models)
Fuel smell or rough idle right after refueling (related EVAP venting)
How to Fix
Start with the cheap, common causes before condemning the tank. (1) Reseat the gas cap and confirm it clicks/seals, and check for an EVAP code (P0440/P0441/P0452) with a scan tool, since a loose cap or stuck purge valve produces both the code and slow fills; on 2019+ cars a PCM software update (TSB) addresses some EVAP-code cases. (2) As a free workaround owners widely confirm: insert the nozzle fully and squarely so the pump's vapor-recovery boot seals against the filler, fill on the slow/first click of the trigger, and avoid topping off, which lets the tank breathe and adds nearly a gallon before shutoff. (3) Have a shop inspect the EVAP venting path for restriction: the vapor recirculation tube (check for kinks/blockage), the fuel filler tube, the EVAP fresh-air filter and vent hoses, and the canister vent (control) valve, and clear any restriction or replace the failed valve (the vent/purge solenoid is an inexpensive part, roughly $30-$120 plus labor). (4) If the venting path is clear and the symptom persists, especially on the documented saddle/two-half-tank cars, the fix is replacement of the fuel tank assembly, which is the costly end of the range. Many owners live with the workaround indefinitely since it is not a driveability problem.
What you need to fix it
Only diagnosis- and fitment-reviewed repair parts are linked here.
Genuine Mopar 5278632AG fuel filler cap
Replace a visibly damaged or non-sealing early-car cap after reseating and seal inspection Fitment: 2008-2010 Challenger 3.5L/5.7L/6.1L only; a cap cannot cure a restricted vent tube or tank internal fault $31.46 and Add to Cart on the l…
Replace a confirmed non-sealing cap before deeper EVAP vent-path diagnosis Fitment: 2011-2019 Challenger only; supersedes 68139752AA/52030389AA and does not cover the late 2020-2023 cap family $26.62 and Add to Cart on the live OEM produ…
Replace only after command/vacuum testing identifies a stuck or restricted purge valve contributing to refueling or post-refuel symptoms Fitment: Live fitment lists 2015-2023 Challenger 3.6L/5.7L/6.2L/6.4L; this engine-bay purge valve is…
Replace a kinked, damaged or internally restricted filler tube after physical inspection isolates the tube Fitment: Live fitment lists 2011-2023 Challenger 3.6L/5.7L/6.2L/6.4L and supersedes several year-specific tubes; it does not cover…
Replace a confirmed kinked or blocked vapor-recirculation tube after the complete fill/vent path is inspected Fitment: The live catalog lists 2011-2014 and 2018 Challenger configurations; it is not continuous 2011-2019 coverage despite t…
2020-specific repair for a diagnosed restriction in this exact vapor-recirculation branch Fitment: Live fitment lists 2020 Challenger 3.6L and 5.7L; do not use for 6.2L/6.4L or other model years without an exact catalog match $53.65 and …
Chrysler (FCA US LLC) is recalling certain 2019 Dodge Challenger and Charger and Chrysler 300 vehicles. The instrument cluster may not properly illuminate driver warnings. As such, these vehicles fail to comply with the requirements of Federal Motor Vehicle Safety Standard (FMVSS) number 101, "Control and Displays."
Campaign #19V20300014/03/2019
SERVICE BRAKES
Chrysler (FCA US LLC) is recalling certain 2019 Dodge Challenger and Charger vehicles. An incompatible front wheel and brake package was installed and may allow the front tire to contact the steering knuckle, causing tire damage.
What is the 2015-2023 Dodge Challenger Driveshaft Failure / U-Joint Failure?
The rear driveshaft on high-powered Challengers can experience premature U-joint failure or driveshaft issues, especially under hard launches, drag racing, or with aftermarket power upgrades. The factory driveshaft may not handle repeated high-torque loads. Some owners report mul… Repairs typically run $300-$2,500. Severity: high.
What is the 2015-2023 Dodge Challenger Electronic Power Steering (EPS) Rack Failure?
The EPS rack assembly can fail suddenly, causing complete loss of steering assist while driving. Circuit board contamination in the EPS module causes short circuit. Corrosion in rack assembly compounds the issue. Recalls S19 (NHTSA 16V-167) and VB8 (NHTSA 19V-812) cover some vehi… Repairs typically run $1,200-$2,800. Severity: high.
What is the 2011-2014 Dodge Challenger Sudden alternator failure causing stall, electrical loss, and fire risk (Recalls 14V634 & 17V435)?
The 2011-2014 Dodge Challenger is the subject of two overlapping NHTSA safety recalls for sudden alternator failure, and CarComplaints.com ranks alternator failure among the worst-reported electrical problems on the 2012 model year (its lowest-rated year overall). The root cause… Repairs typically run $0-$1,290. Severity: high.
What is the 2008-2014 Dodge Challenger TIPM (Totally Integrated Power Module) Failure — Random No-Start, Fuel-Pump No-Prime, Stalling & Battery Drain?
The Totally Integrated Power Module (TIPM-7 generation) is the Challenger's central fuse-and-relay box and power-distribution computer, mounted in the engine bay. It manages nearly every electrical circuit, and a single failed solder joint, blown internal circuit-board trace, or… Repairs typically run $700-$1,100. Severity: high.
What is the 2011-2023 Dodge Challenger Valve Spring Failure on 6.4L 392 HEMI (High-RPM and Modified/Boosted Cars)?
The production valve springs on the 6.4L 392 HEMI can crack or fracture. A weakened spring can cause a persistent single-cylinder misfire that remains after plug, coil, or injector swaps; a complete fracture can let the valve contact the piston and cause major cylinder-head or en… Repairs typically run $700-$5,000. Severity: high.
What is the 2018 Dodge Challenger PCM Circuit-Board Voltage Regulator Failure on the 2018 Challenger — Recall 18V524000 (U87)?
The 2018 Dodge Challenger appears on the vehicle list for NHTSA recall 18V524000. On the recalled cars, the voltage regulator chip inside the powertrain control module's circuit board may fail. The two outcomes described in the recall are a stall and a no-start — the car either s… Severity: high.
What is the 2015-2023 Dodge Challenger Hellcat IHI Supercharger Bearing / Pulley Failure?
The IHI twin-screw supercharger fitted to the 6.2L supercharged HEMI in the Challenger SRT Hellcat, Redeye, and Demon is prone to internal bearing failure, typically heard first as a rising whine, growl, or whir from the front of the engine that gets louder with RPM and engine wa… Repairs typically run $3,000-$12,000. Severity: high.
What is the 2013 Dodge Challenger Engine-Bay Wiring/Starter Cable Short-Circuit Fire Risk — Safety Recall (2013 V6, NHTSA 13V103 / Chrysler N18)?
In March 2013, Chrysler Group LLC issued an urgent safety recall (NHTSA Campaign 13V103000, Chrysler recall N18) for a narrow build window of 2013 Dodge Challenger V6 models — vehicles equipped with the 3.6L Pentastar V6 and manufactured at the Brampton, Ontario plant between Dec… Repairs typically run $0-$0. Severity: high.
What is the 2008-2014 Dodge Challenger Dodge Challenger Engine Stalls / Shuts Off While Driving (Alternator & TIPM/Fuel-Pump-Relay Failure)?
The Dodge Challenger has a well-documented tendency to stall or shut off completely without warning while driving — a top-3 engine-category complaint at NHTSA and one of the most-reported electrical/engine problems at CarComplaints. There are two primary, separately documented ro… Repairs typically run $0-$1,200. Severity: high.
What is the 2008-2010 Dodge Challenger Takata Driver Frontal Airbag Inflator Rupture — "Do Not Drive" Recall (NHTSA 15V444000)?
First-generation (2008-2010) Dodge Challengers are equipped with a Takata dual-stage driver's frontal airbag inflator that is subject to NHTSA recall 15V444000 (FCA/Chrysler recall R37) — part of the largest and most dangerous auto recall in history. The ammonium-nitrate-based pr… Repairs typically run $0-$0. Severity: high.
What is the 2015-2018 Dodge Challenger 2015-2018 Challenger Cruise Control May Not Disengage (Recall 18V332000)?
Dodge Challengers built for the 2015 through 2018 model years are covered by FCA recall 18V332000. The recalled defect could prevent the cruise control system from disengaging: NHTSA states that if a short circuit occurs within the car's wiring while cruise control is engaged, th… Severity: high.
What is the 2015-2021 Dodge Challenger HEMI Lifter/MDS Tick?
Some 2015-2021 Dodge Challenger 5.7L and 6.4L engines can develop a persistent engine-speed-related tick, rough idle, loss of power, or misfire from hydraulic roller-lifter, roller, or cam-lobe wear. A tick alone does not prove internal wear: exhaust-manifold leakage, injector no… Repairs typically run $100-$2,500. Severity: medium.
What is the 2011-2021 Dodge Challenger OEM Radiator Premature Failure?
The factory plastic-tank radiators on Challengers are prone to cracking and leaking, especially under spirited driving or in hot climates. The crimped plastic end tanks can fail at the seams. Many owners report needing radiator replacements between 60,000-100,000 miles. Repairs typically run $200-$800. Severity: medium.
What is the 2011-2023 Dodge Challenger Pentastar 3.6L Oil Filter Housing Leak?
The plastic oil filter housing warps and cracks from heat cycling, causing oil leaks from front of engine near oil filter. In severe cases coolant and oil can mix. Common across all Pentastar 3.6L vehicles (Challenger, Charger, 300, Jeep, Ram). Repairs typically run $400-$900. Severity: medium.
What is the 2015-2023 Dodge Challenger Pentastar V6 Rocker Arm/Lifter Tick?
The 3.6L Pentastar V6 engine can develop a ticking noise from worn rocker arms. Unlike the HEMI MDS tick, this is caused by the roller follower rocker arms wearing out prematurely. The issue typically appears between 50,000-100,000 miles and is more common on 2011-2013 engines bu… Repairs typically run $800-$1,400. Severity: medium.
What is the 2008-2023 Dodge Challenger HEMI Exhaust Manifold Bolt Failure?
Exhaust manifold bolts break due to thermal cycling causing the bolts to become brittle and snap, especially on the passenger side. Dissimilar metals (iron manifold, aluminum head) accelerate the process. Creates a ticking noise at cold startup. Common across all HEMI-powered LX/… Repairs typically run $400-$1,500. Severity: medium.
What is the 2015-2023 Dodge Challenger ZF 8-Speed Transmission Harsh Shifting and Valve Body Failure?
The ZF 8HP45/8HP70 8-speed automatic suffers from harsh downshifts (especially 2nd to 1st), rough upshifts with RPM spikes, and clunking when cold. Ferrous or aluminum debris in 3-4 shift pressure valves is the primary failure point. Valve body is the most common component needin… Repairs typically run $800-$2,500. Severity: medium.
What is the 2015-2023 Dodge Challenger Uconnect Infotainment Freeze, Black Screen, and Random Reboot (Backup Camera Loss)?
The Uconnect infotainment system (8.4-inch 4C/4C NAV/UAQ head units, and the 7-inch Uconnect 4) on the Dodge Challenger is widely reported to freeze, go to a black or blue blank screen, and spontaneously reboot — sometimes in continuous reboot loops while driving. The fault is in… Repairs typically run $200-$3,400. Severity: medium.
What is the 2008-2023 Dodge Challenger AC Not Blowing Cold / HVAC Blend-Door Actuator Failure?
Dodge Challenger owners across the LC/LA platform (2008-2023) commonly report the A/C not blowing cold, blowing warm/weak, or one side of the cabin staying warm. The complaints split into two distinct failure clusters that share the same symptom.
CLUSTER 1 - Refrigerant/AC-syste… Repairs typically run $35-$1,940. Severity: medium.
What is the 2008-2023 Dodge Challenger Battery Drain / Parasitic Draw — Battery Dead Overnight or After Sitting?
A widely reported electrical complaint across nearly all Challenger model years is excessive parasitic battery drain that leaves the car dead overnight or after sitting a few days. A healthy modern vehicle should settle to roughly 25-50 mA of key-off draw once all modules go to s… Repairs typically run $140-$1,200. Severity: medium.